
Note: This feature is enterprise only, kindly login with admin access to set this up
Auth0 SSO SetUp Guide in order to start the SSO setup for AppSecEngineer with Auth0, follow these steps:
- Go to Auth0 console → Applications → Create Application
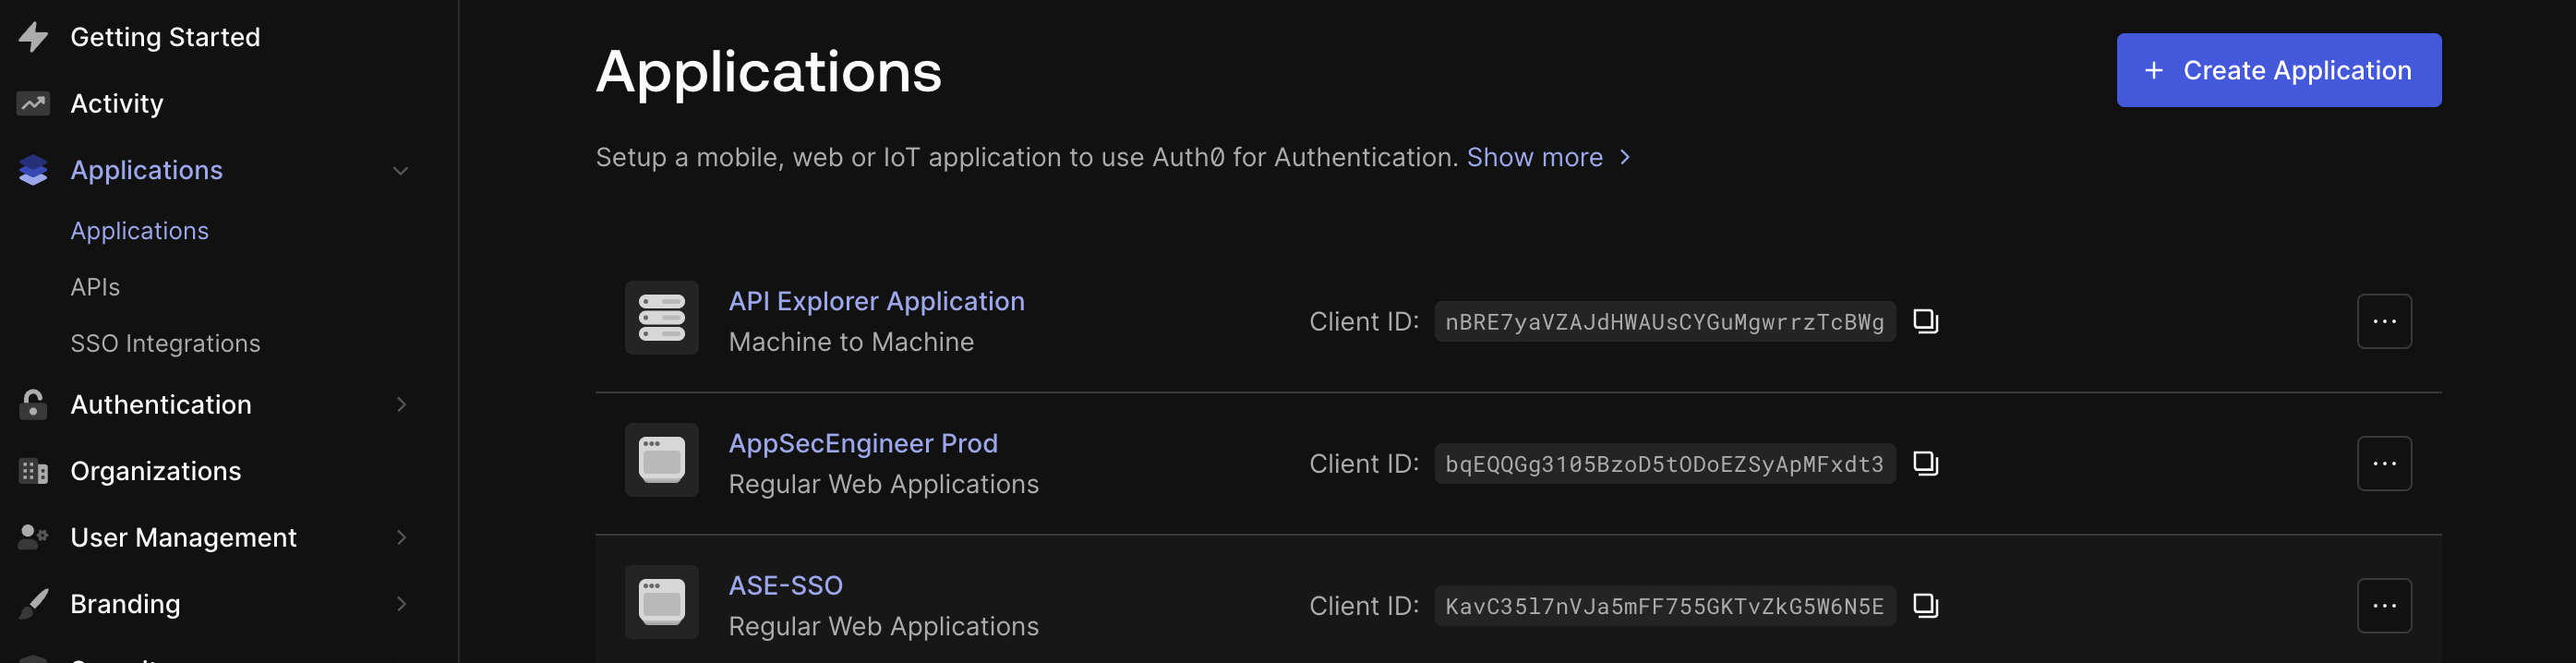 Auth0 Applications dashboard displaying a list of registered applications, including "API Explorer Application," "AppSecEngineer Prod," and "ASE-SSO," along with their client IDs. The left navigation panel includes options like "Applications," "Authentication," and "User Management," with a "Create Application" button in the top right corner.
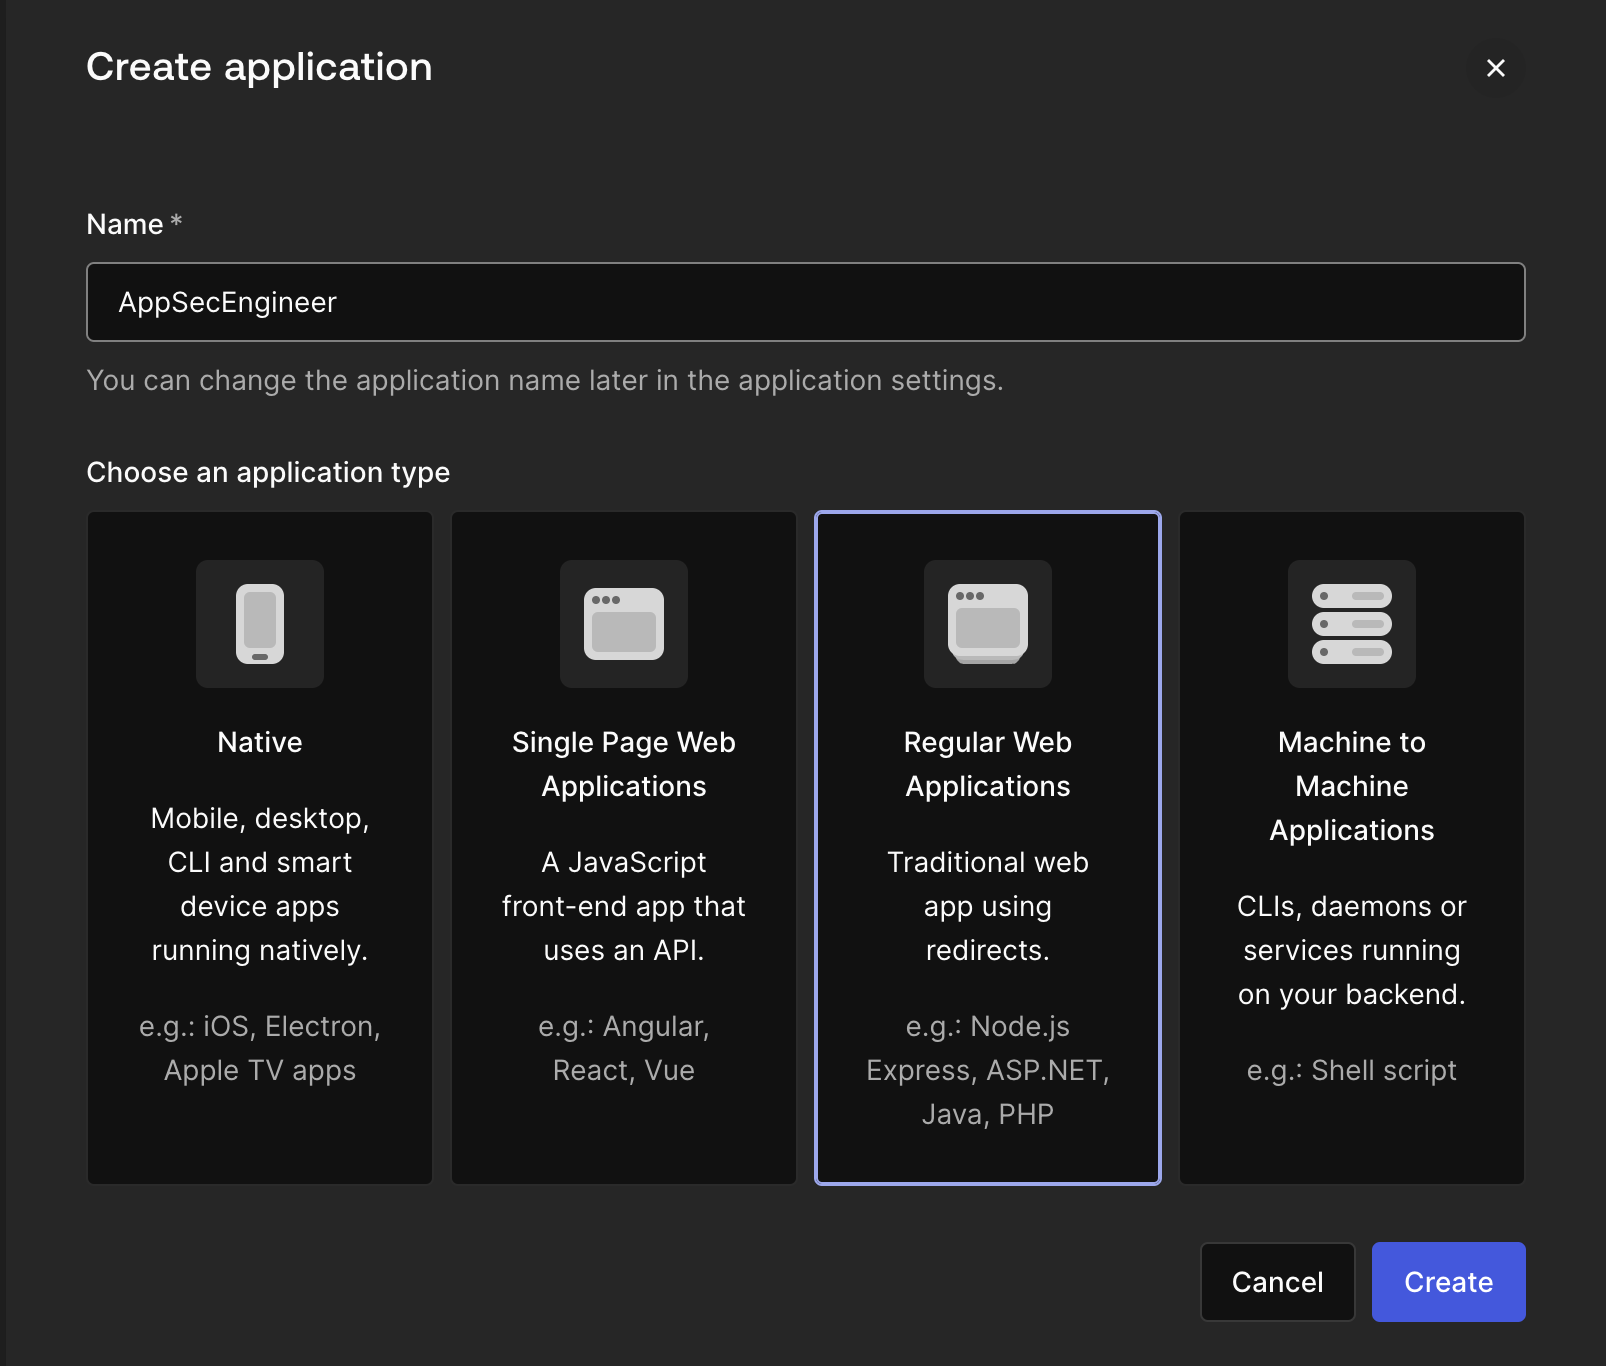 The Auth0 "Create Application" interface allows users to name their application and select from four types: Native, Single Page Web Applications, Regular Web Applications, and Machine to Machine Applications. The selected option, "Regular Web Applications," is highlighted, and "Cancel" and "Create" buttons are visible at the bottom.
- Select Regular Web Application
- Give it a recognizable name something like “AppSecEngineer training” and hit “Create”
- Once the application has been created, go to “Addons”
 The Auth0 application settings page for "AppSecEngineer Prod" under the "Addons" tab displays integration options. The SAML2 Web App addon is enabled, while the WS-FED Web App addon is disabled. Other tabs like Quickstart, Settings, Credentials, APIs, Connections, and Organizations are available for further configuration.
- Enable the SAML2 WEB APP toggle
- Select the “Settings” from the pop up
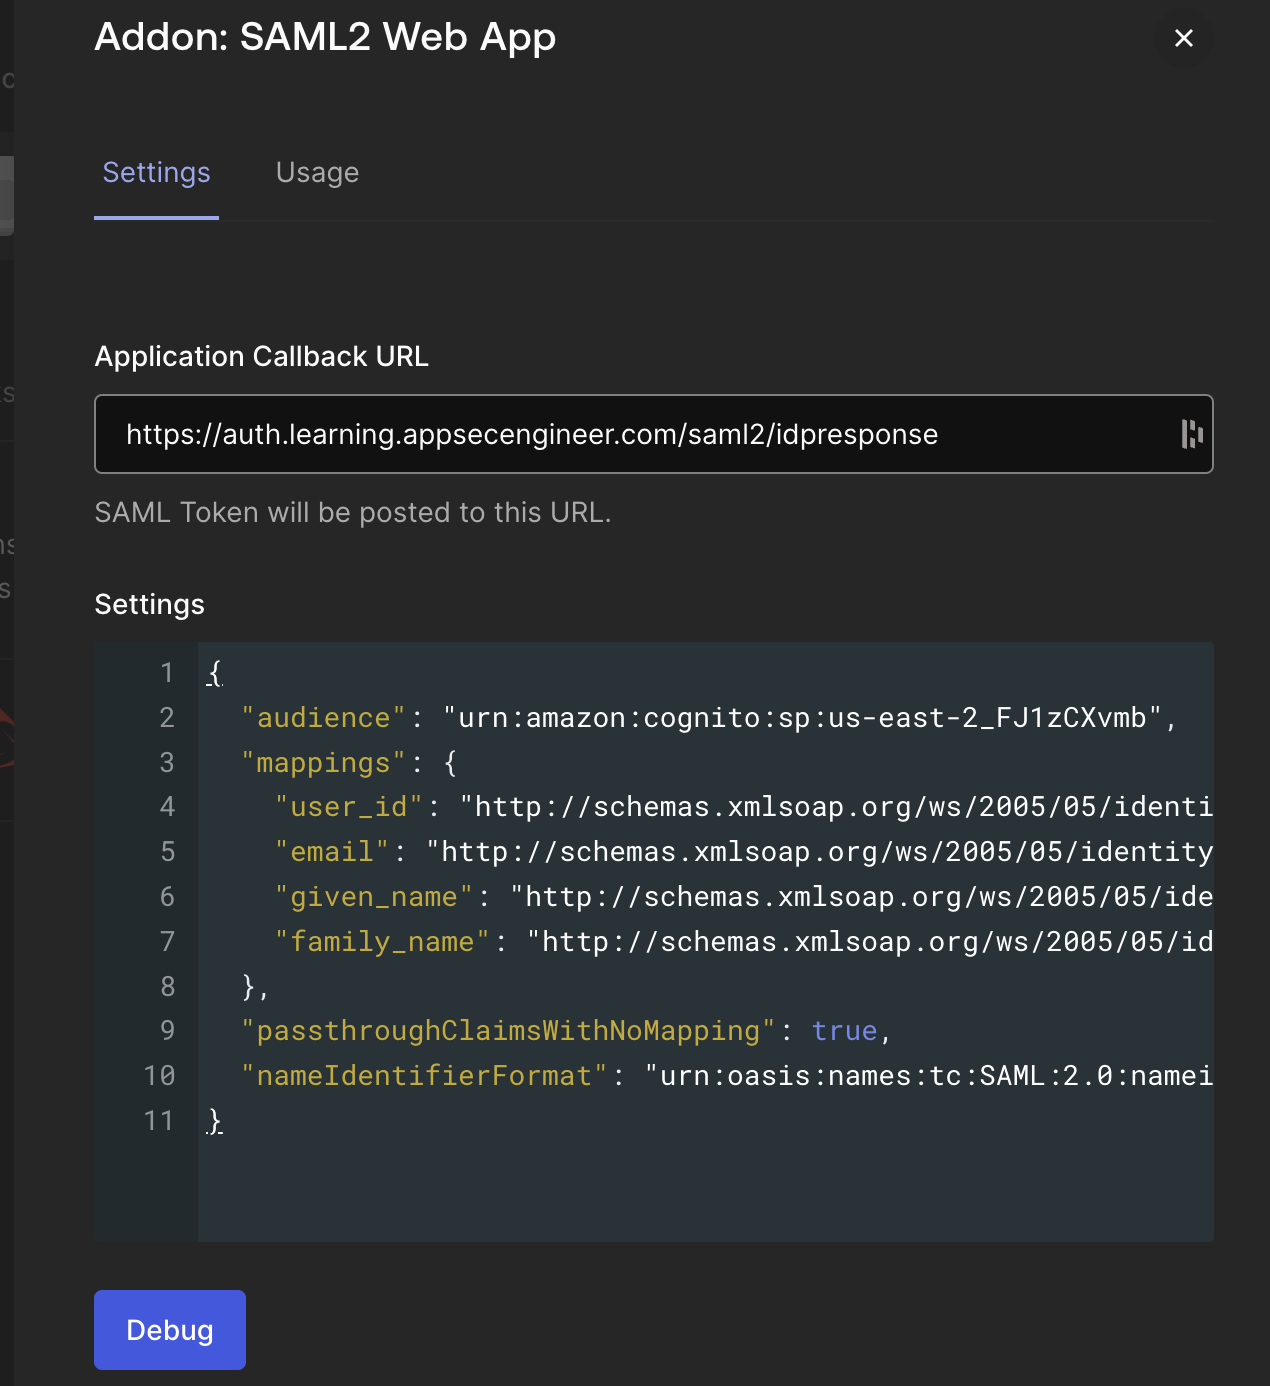 The image shows the configuration interface for the SAML2 Web App addon within an identity provider platform, highlighting fields for the Application Callback URL and JSON-based settings for SAML authentication.
- Paste the following in Application Callback Url:
https://auth.learning.appsecengineer.com/saml2/idpresponse - In the ‘settings’ INPUT field, paste the following JSON
{ "audience": "urn:amazon:cognito:sp:us-east-2_FJ1zCXvmb", "mappings": { "user_id": "http://schemas.xmlsoap.org/ws/2005/05/identity/claims/nameidentifier", "email": "http://schemas.xmlsoap.org/ws/2005/05/identity/claims/emailaddress", "given_name": "http://schemas.xmlsoap.org/ws/2005/05/identity/claims/givenname", "family_name": "http://schemas.xmlsoap.org/ws/2005/05/identity/claims/surname" }, "passthroughClaimsWithNoMapping": true, "nameIdentifierFormat": "urn:oasis:names:tc:SAML:2.0:nameid-format:persistent" }
Click on “Debug”, if the everything is setup properly, it should greet you with a success message.
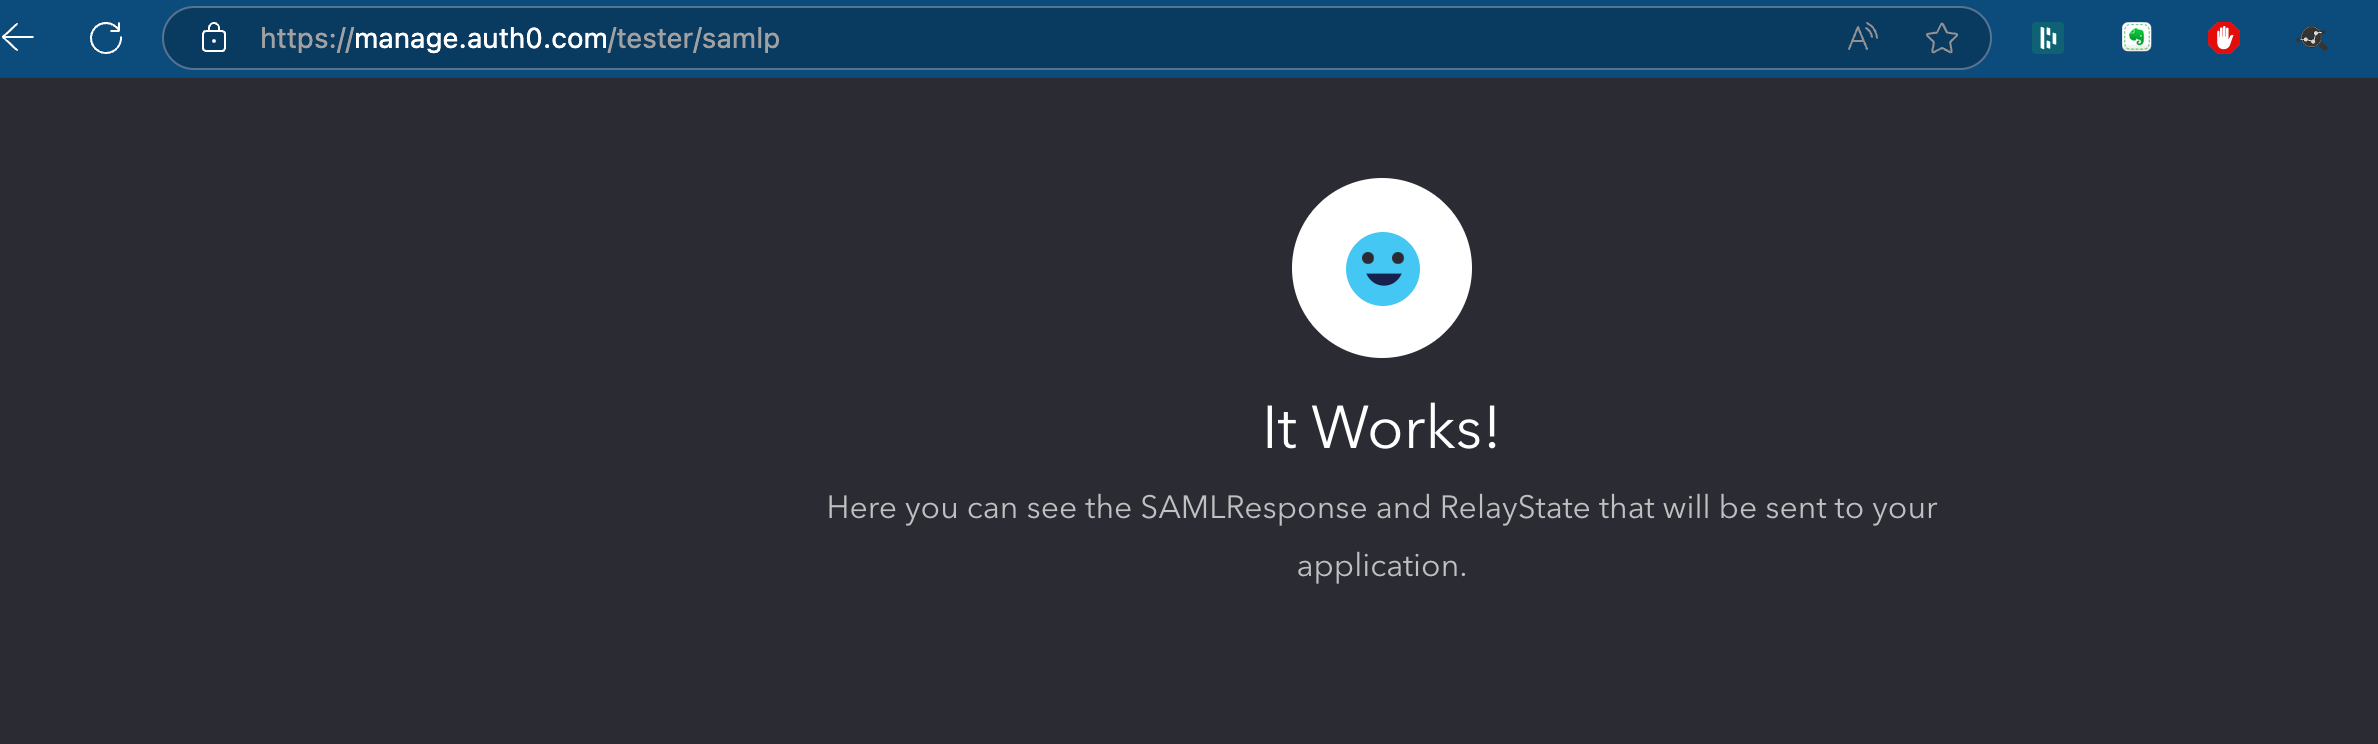 Success message Auth0 inside Auth0 console for SSO integration
- Scroll Down and click on “Enable” and then “Save”
- Scroll up and go to “Usage” tab “Identity Provider Metadata” Download option
- Download the Metadata and communicate back to us with the metadata file attached.
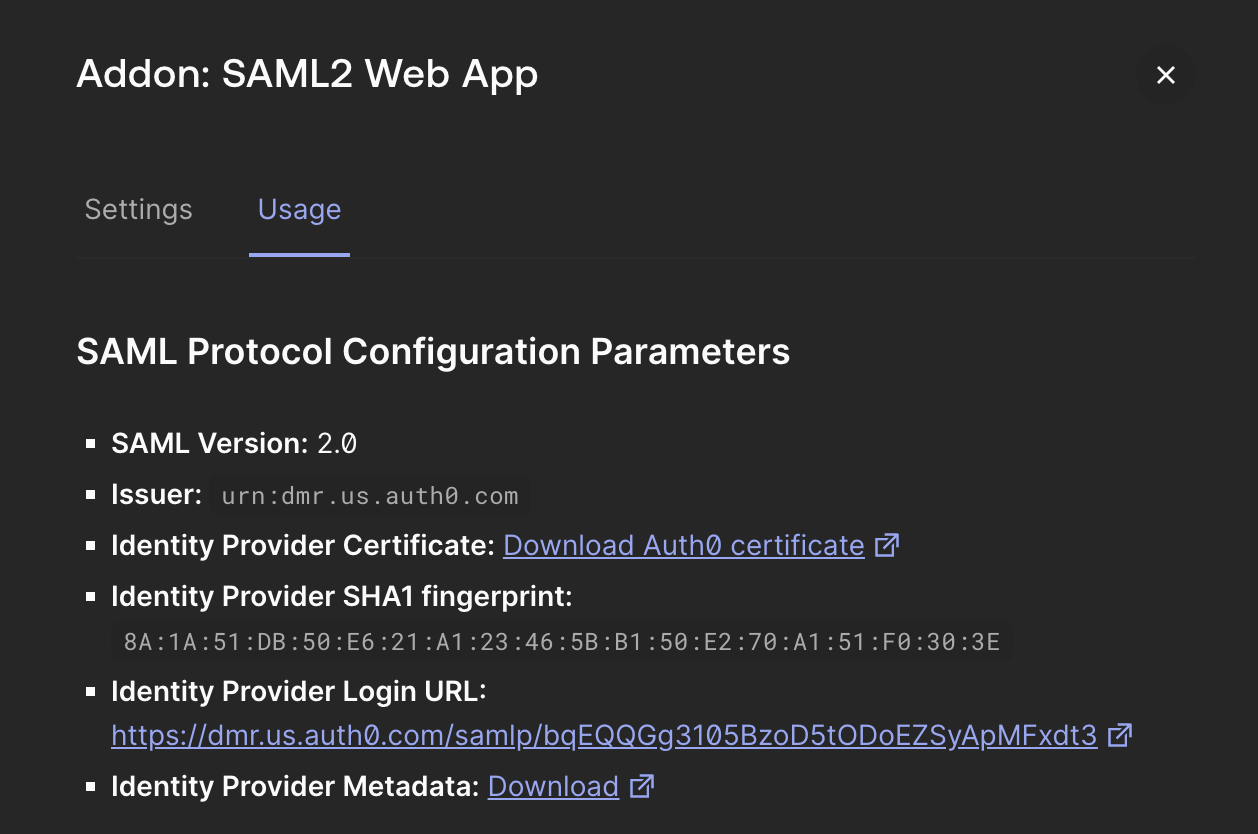 Configuration parameter screenshot for SSO integration in Auth0