
- Login into Azure Portal, Find and go to Microsoft Entra ID service
- Click on Enterprise Application → New Application → Create Your Own application
- Name the application something recognizable such as AppSecEngineer-SCIM, select the Non-gallery option and click on create
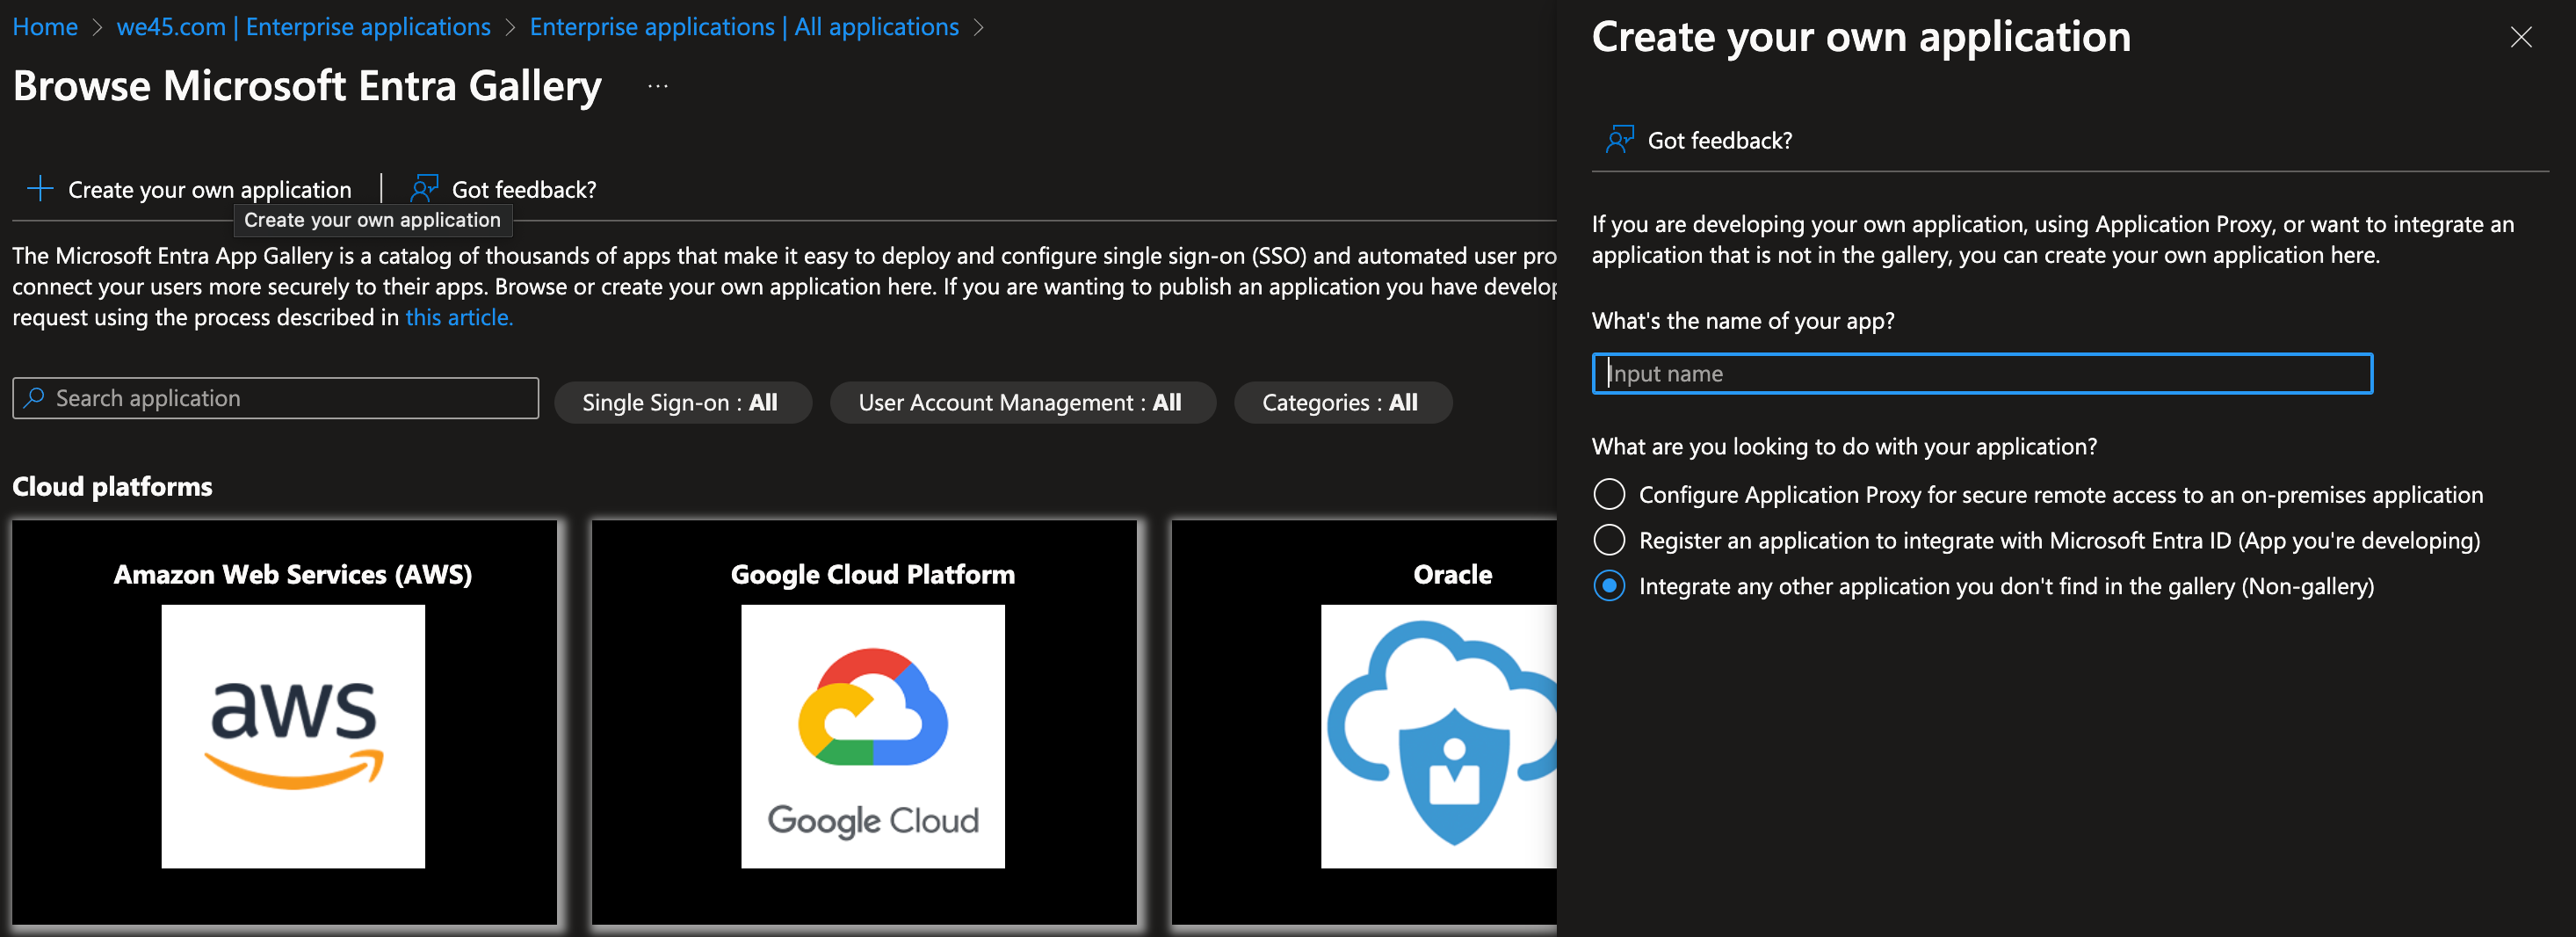 Microsoft Entra Gallery displays a search bar, app creation options, and listed cloud platforms like AWS, Google Cloud, and Oracle. The right panel allows users to name and configure a new application.
4. Once Application has been created, you'll find the following view, from the left navigation menu, select provisioning
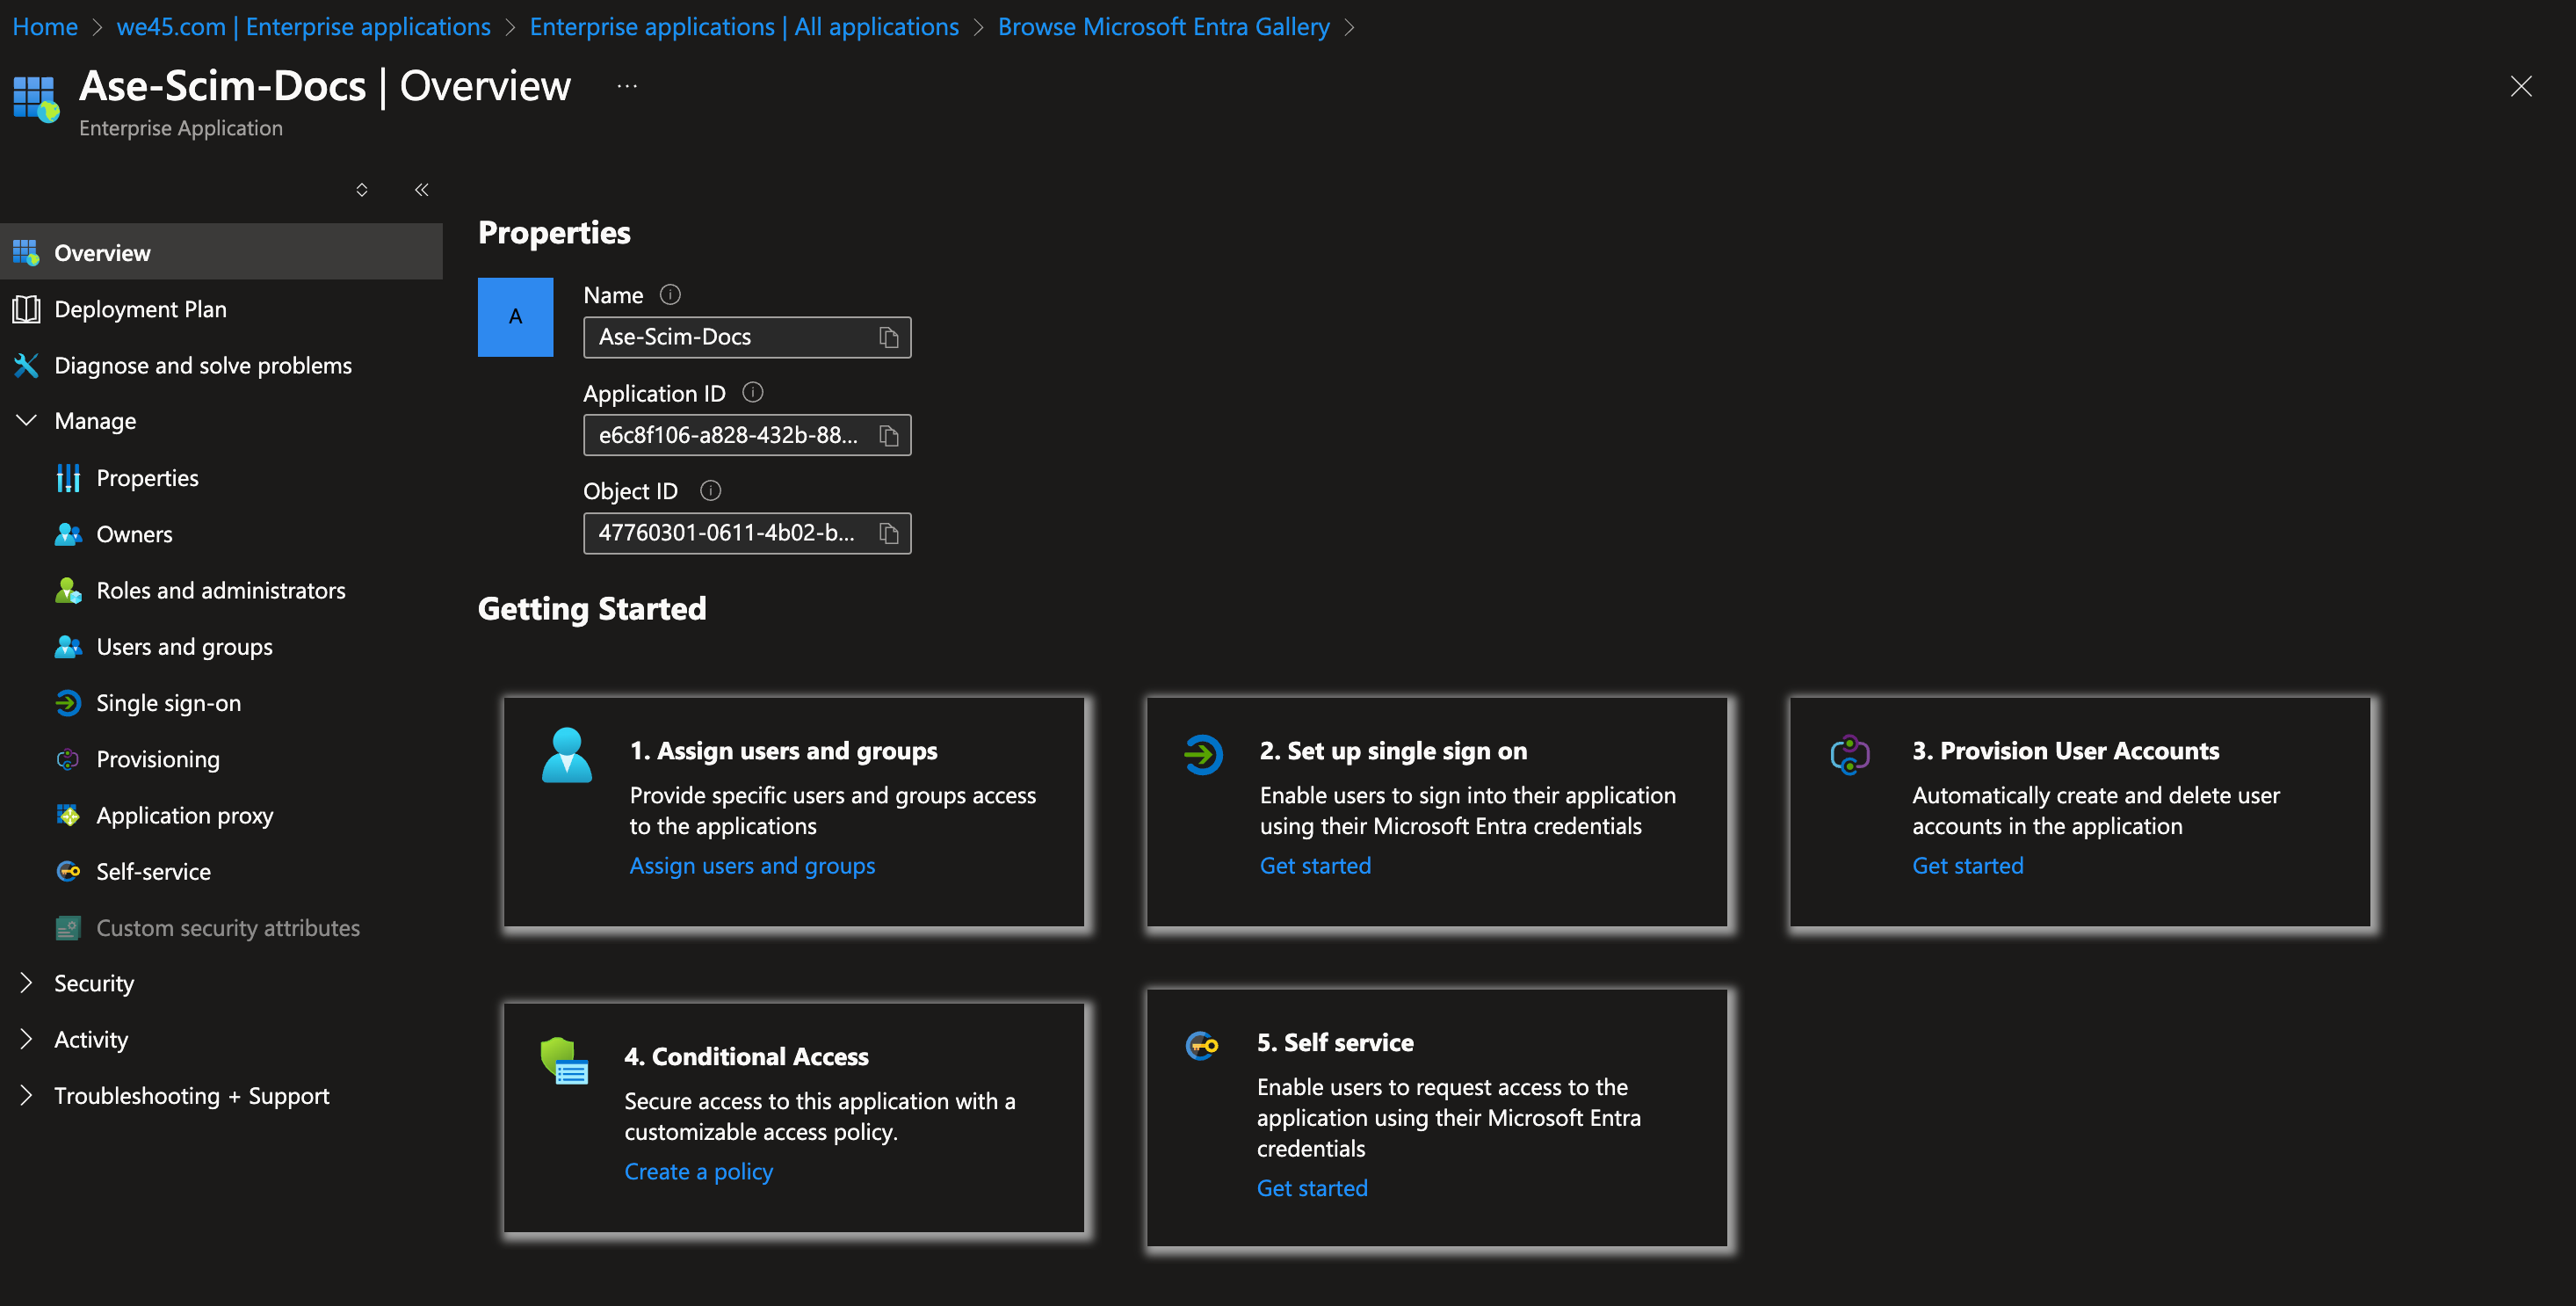 Displays app name, Application ID, Object ID, and setup options: assign users, configure single sign-on, provision accounts, conditional access, and self-service. Navigation menu includes Properties, Security, and Activity.
5. In a separate tab, login to the AppSecEngineer portal, select "Admin login".
Navigate to the sidebar menu, open the admin dropdown. Click on "Integrations".
In the integrations section, note the SCIM integration URL and generate a SCIM secret.
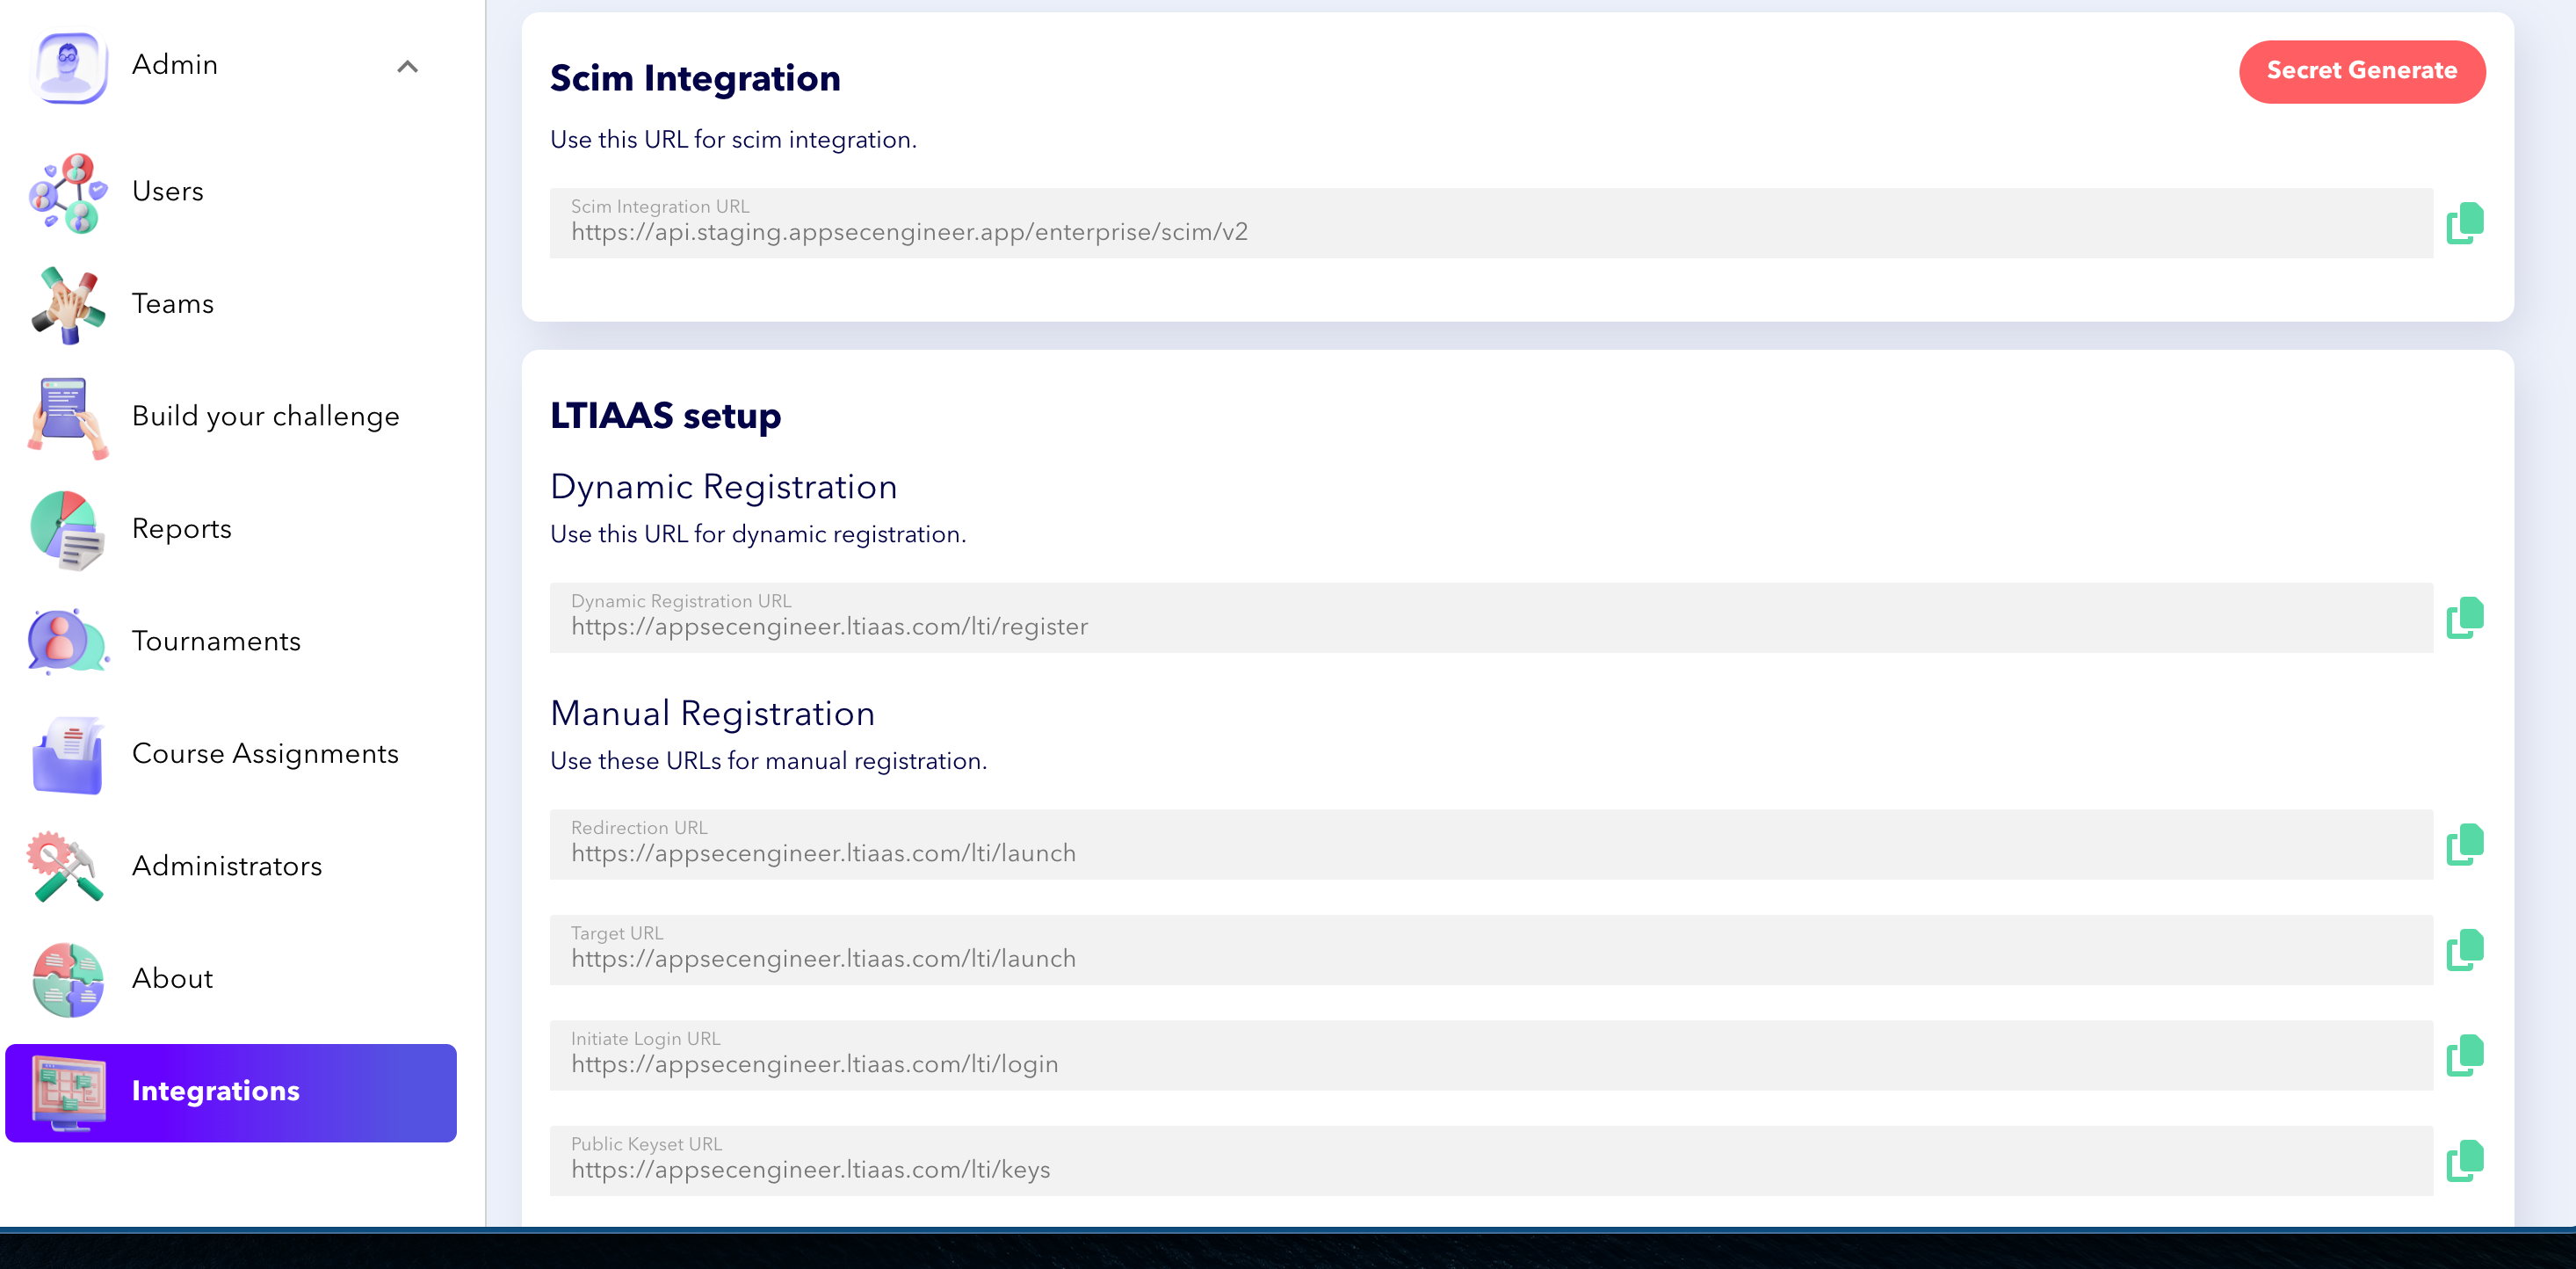 Interface showing SCIM Integration URL and LTIAAS setup sections for dynamic and manual registration. Left menu includes Admin, Users, Teams, Reports, and Integrations.
Navigate to the sidebar menu, open the admin dropdown. Click on "Integrations".
In the integrations section, note the SCIM integration URL and generate a SCIM secret.
Interface showing SCIM Integration URL and LTIAAS setup sections for dynamic and manual registration. Left menu includes Admin, Users, Teams, Reports, and Integrations.6. Go back to the Azure Portal tab, Click on provisioning and you should be able to see the following view.
Click on "Connect your application"
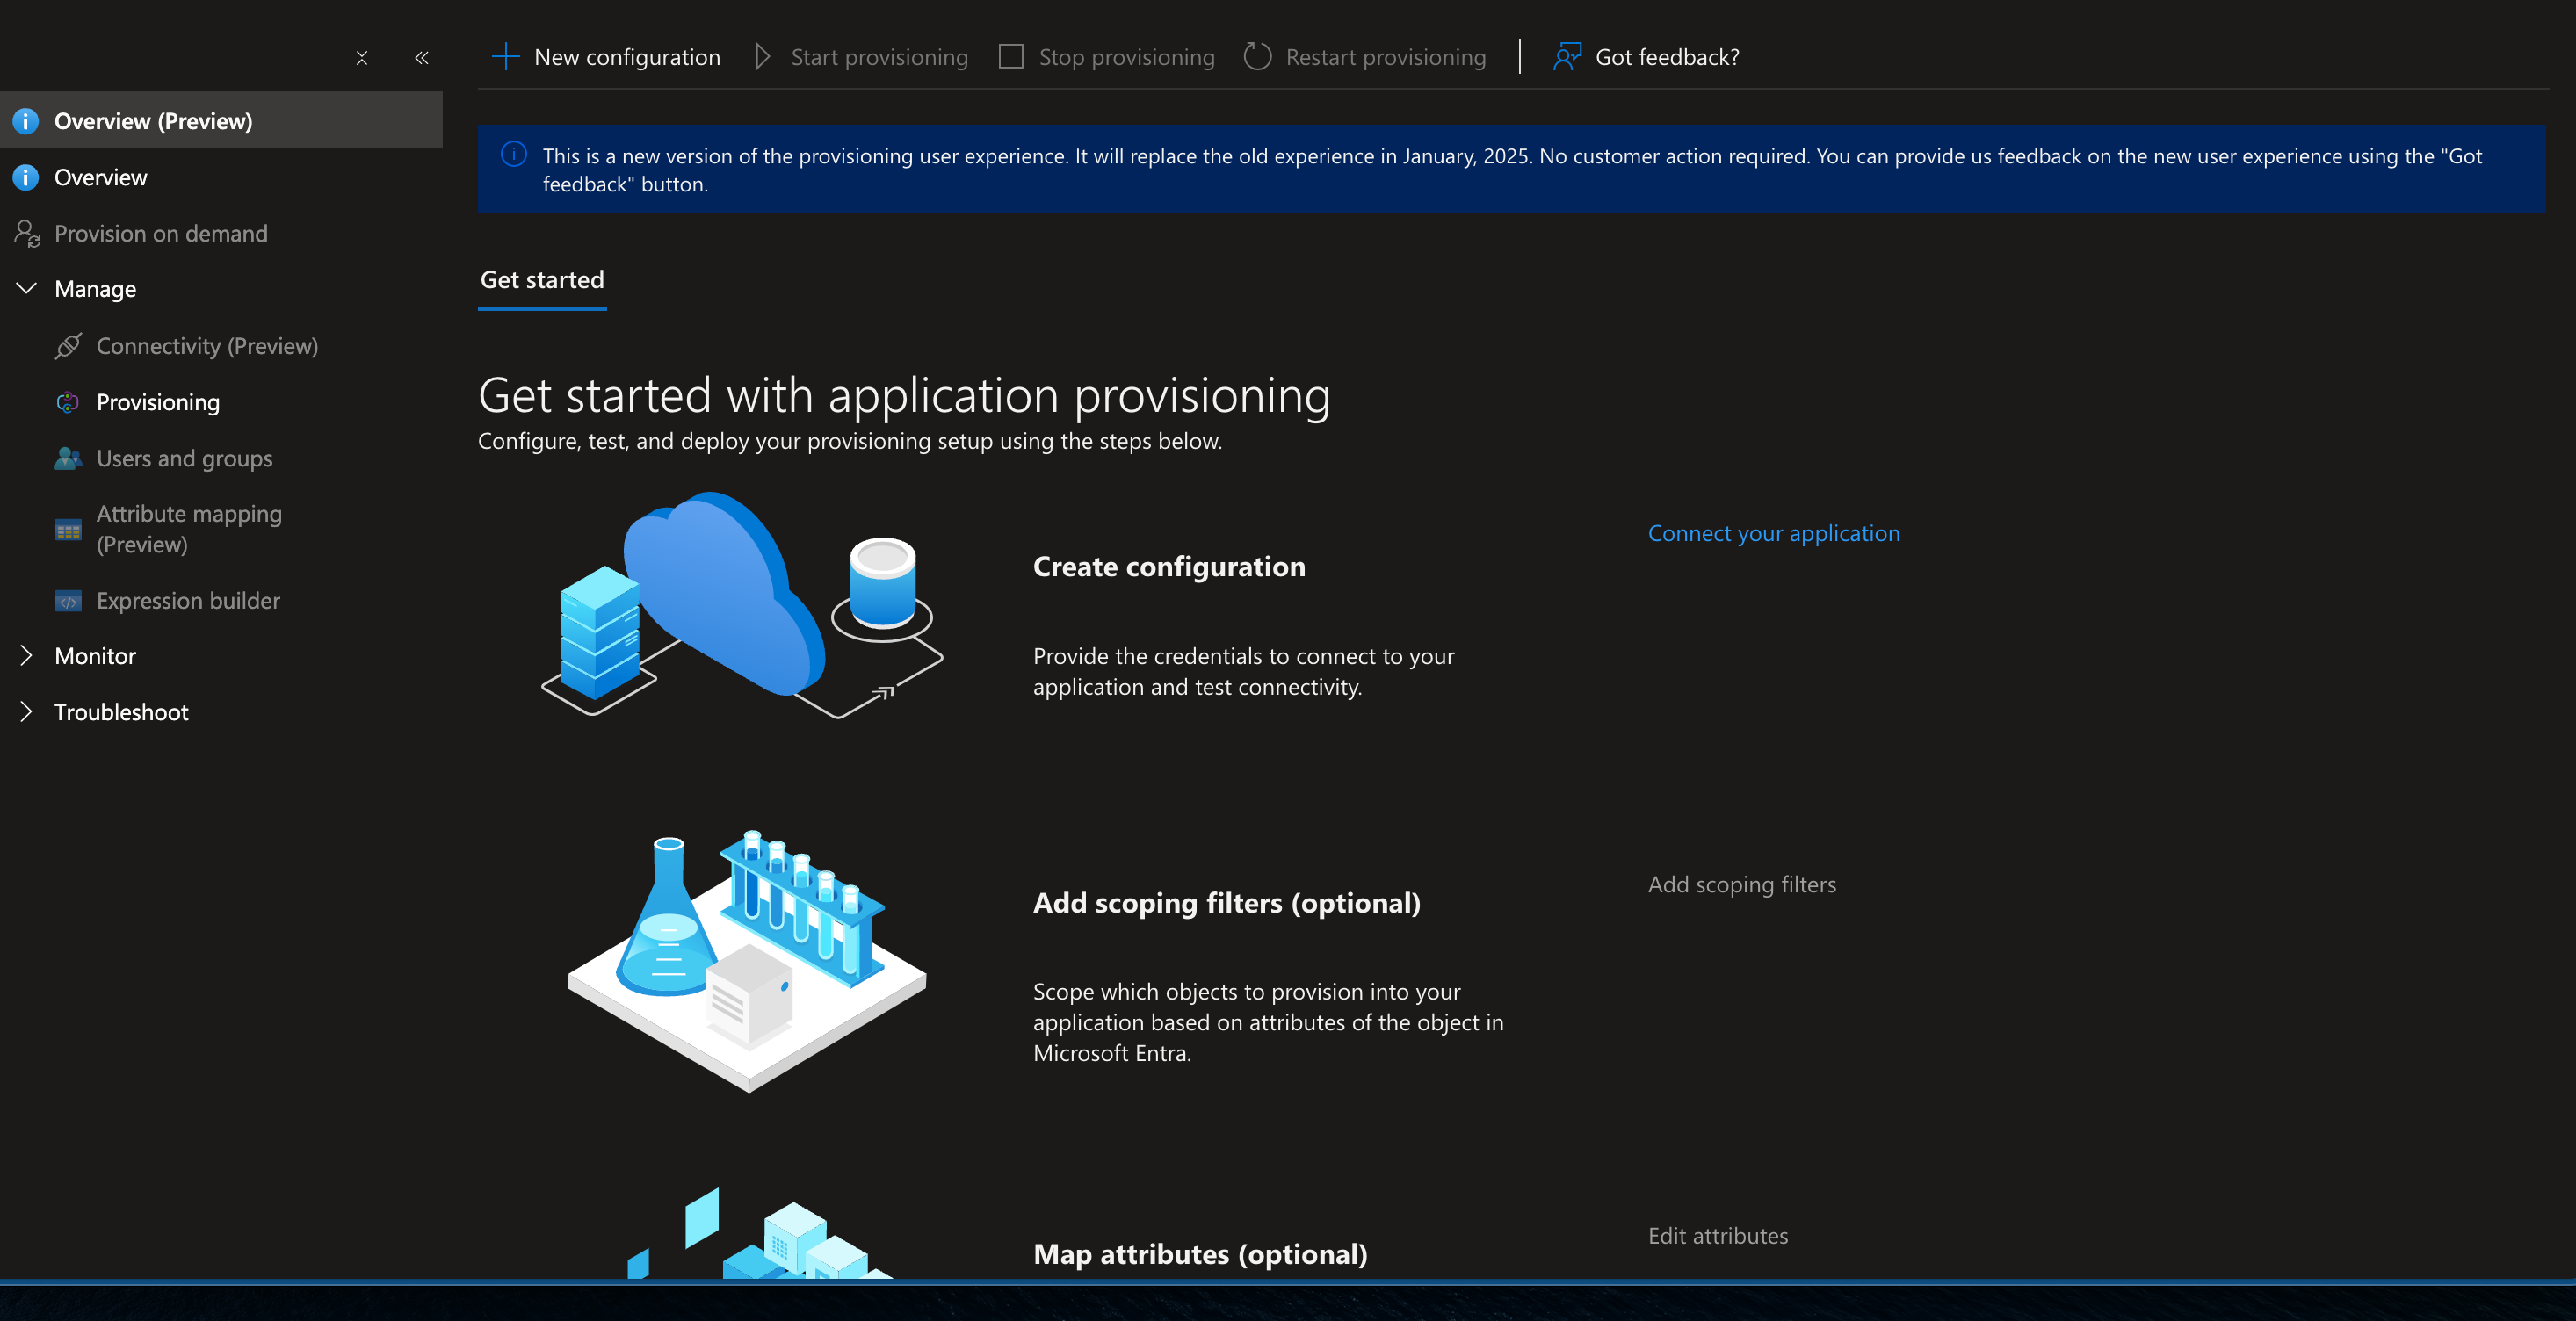 Interface for application provisioning setup, outlining steps like configuration creation, optional scoping filters, and attribute mapping. Features a sidebar menu with options such as Overview, Provisioning, and Monitor, alongside a notice about the new user experience launching in January 2025.
7. I n the "New Provisioning Configuration" page:
Enter the noted SCIM url into the Tenant url field.
Click on "Connect your application"
Interface for application provisioning setup, outlining steps like configuration creation, optional scoping filters, and attribute mapping. Features a sidebar menu with options such as Overview, Provisioning, and Monitor, alongside a notice about the new user experience launching in January 2025.7. I n the "New Provisioning Configuration" page:
Enter the noted SCIM url into the Tenant url field.
Enter the SCIM secret into the secret token field.
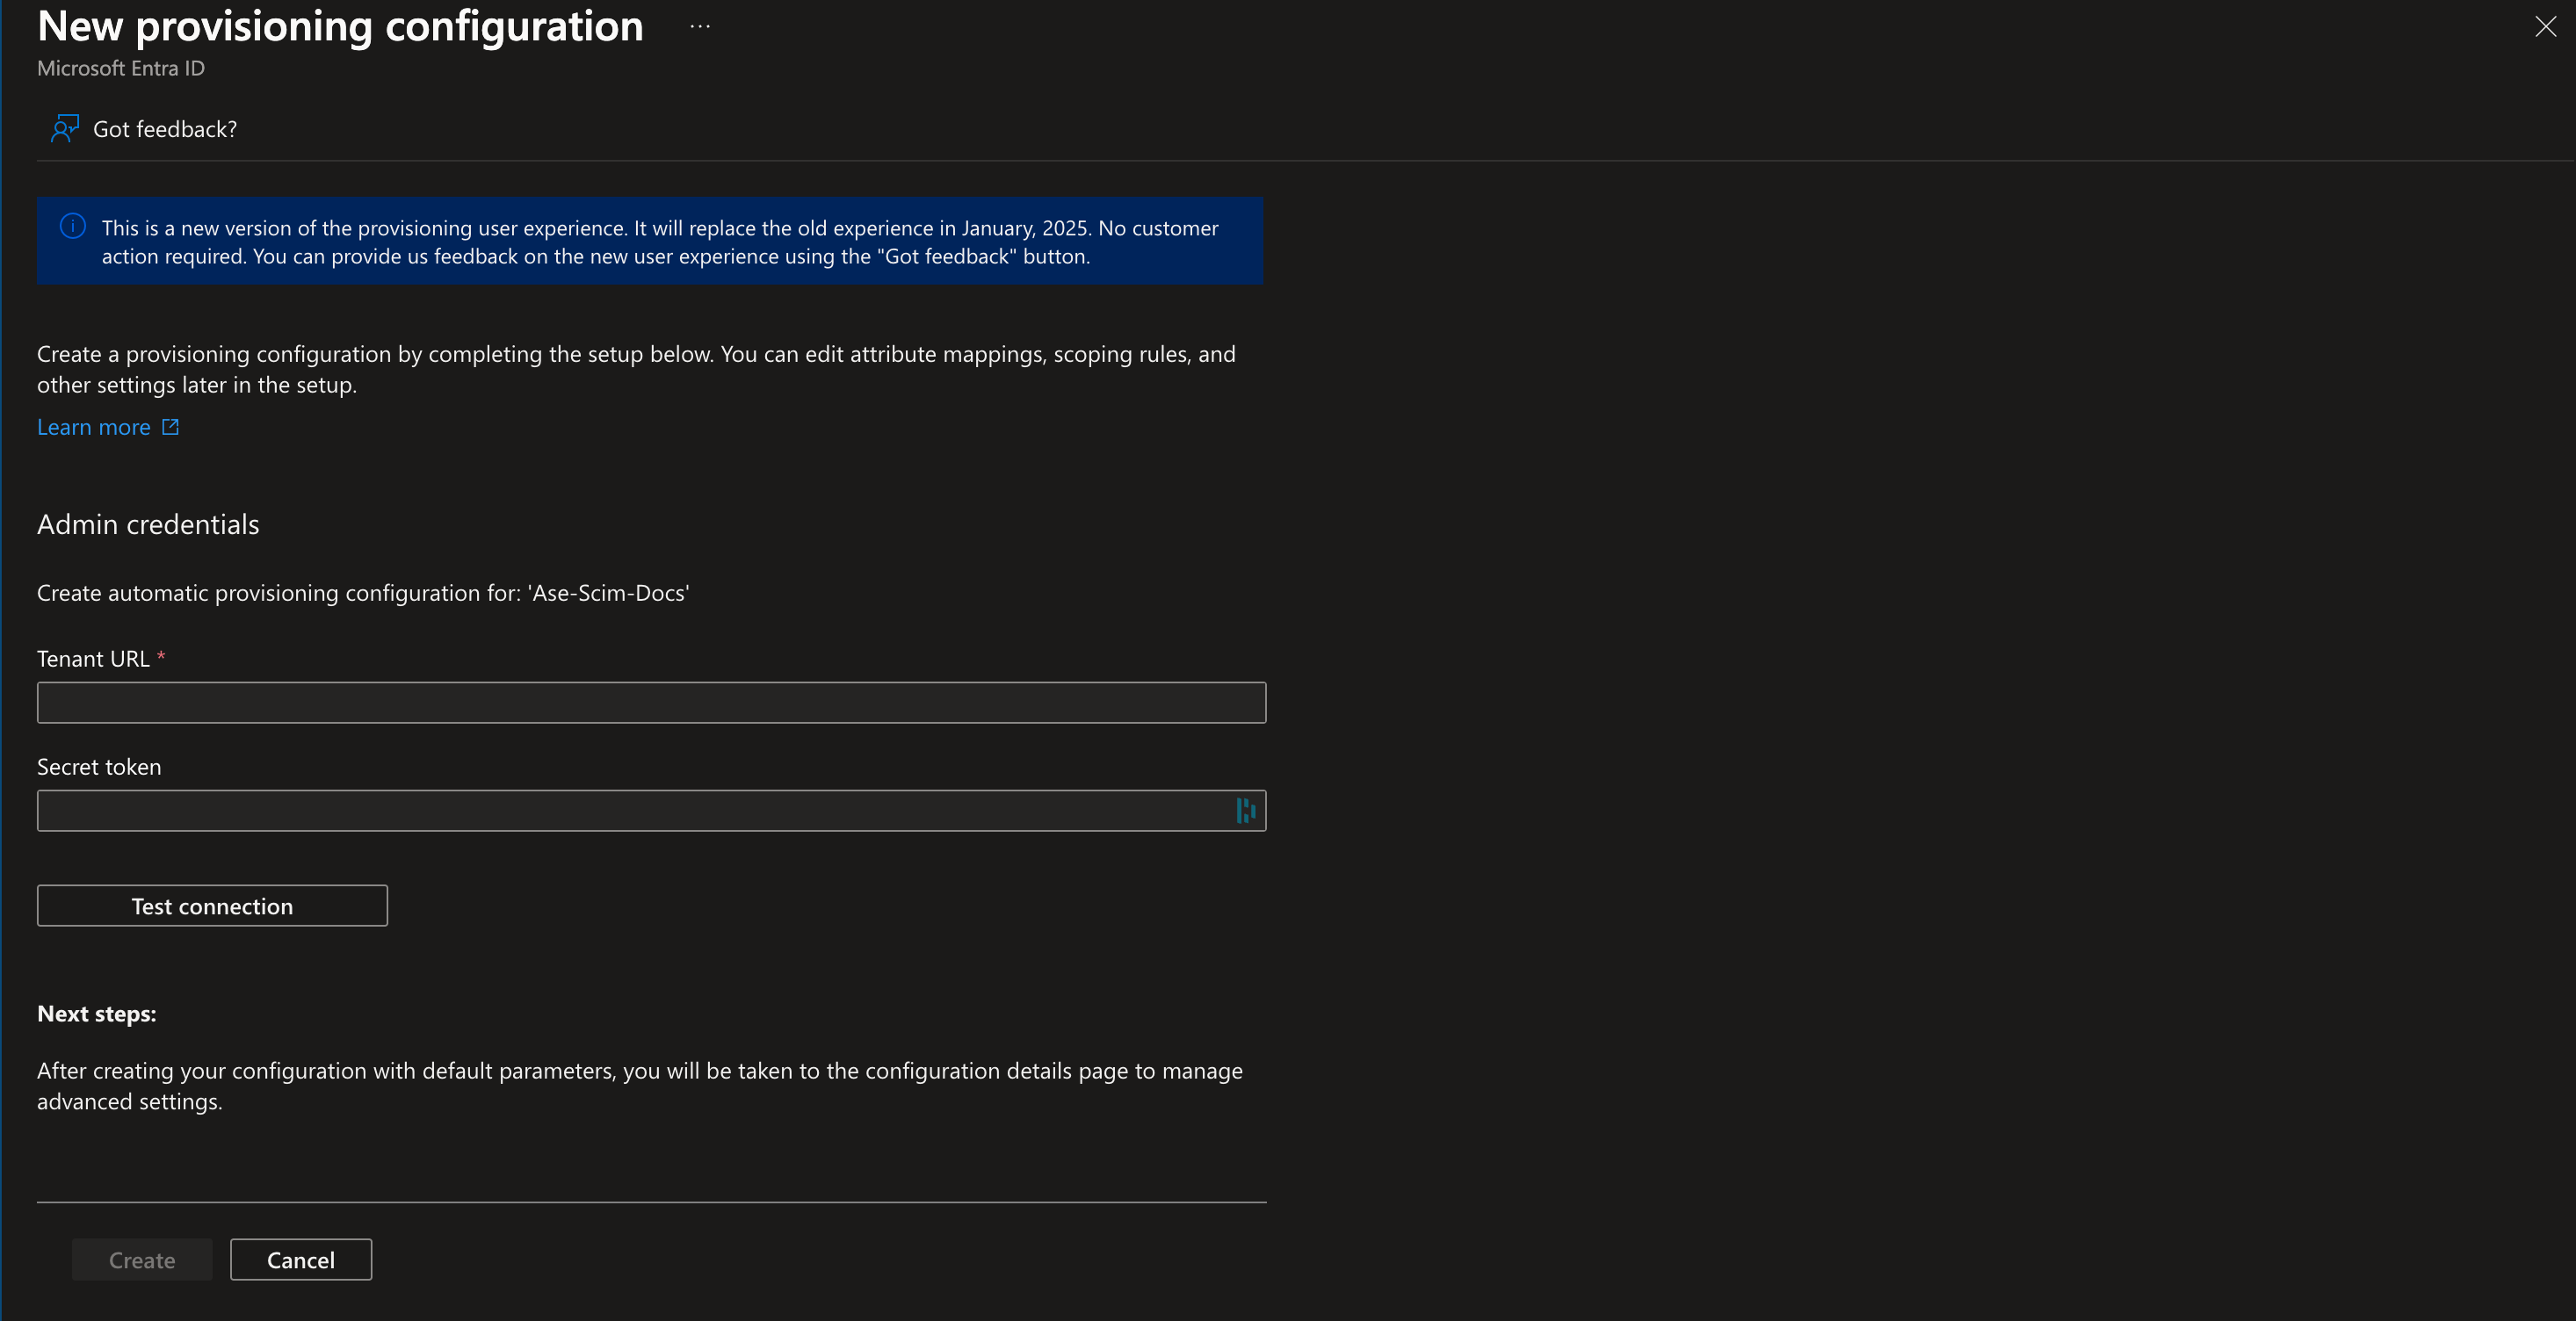 The image displays the setup interface for a new provisioning configuration in Microsoft Entra ID. It includes a message about an upcoming change in user experience, fields for entering admin credentials (Tenant URL and Secret Token), and options for creating or canceling the configuration.
8. Click on "
Test Connection": you should receive a notification that connection is successful. Click on "
Create" to save the configuration.9. After saving the configuration, click on "
Start Provisioning" 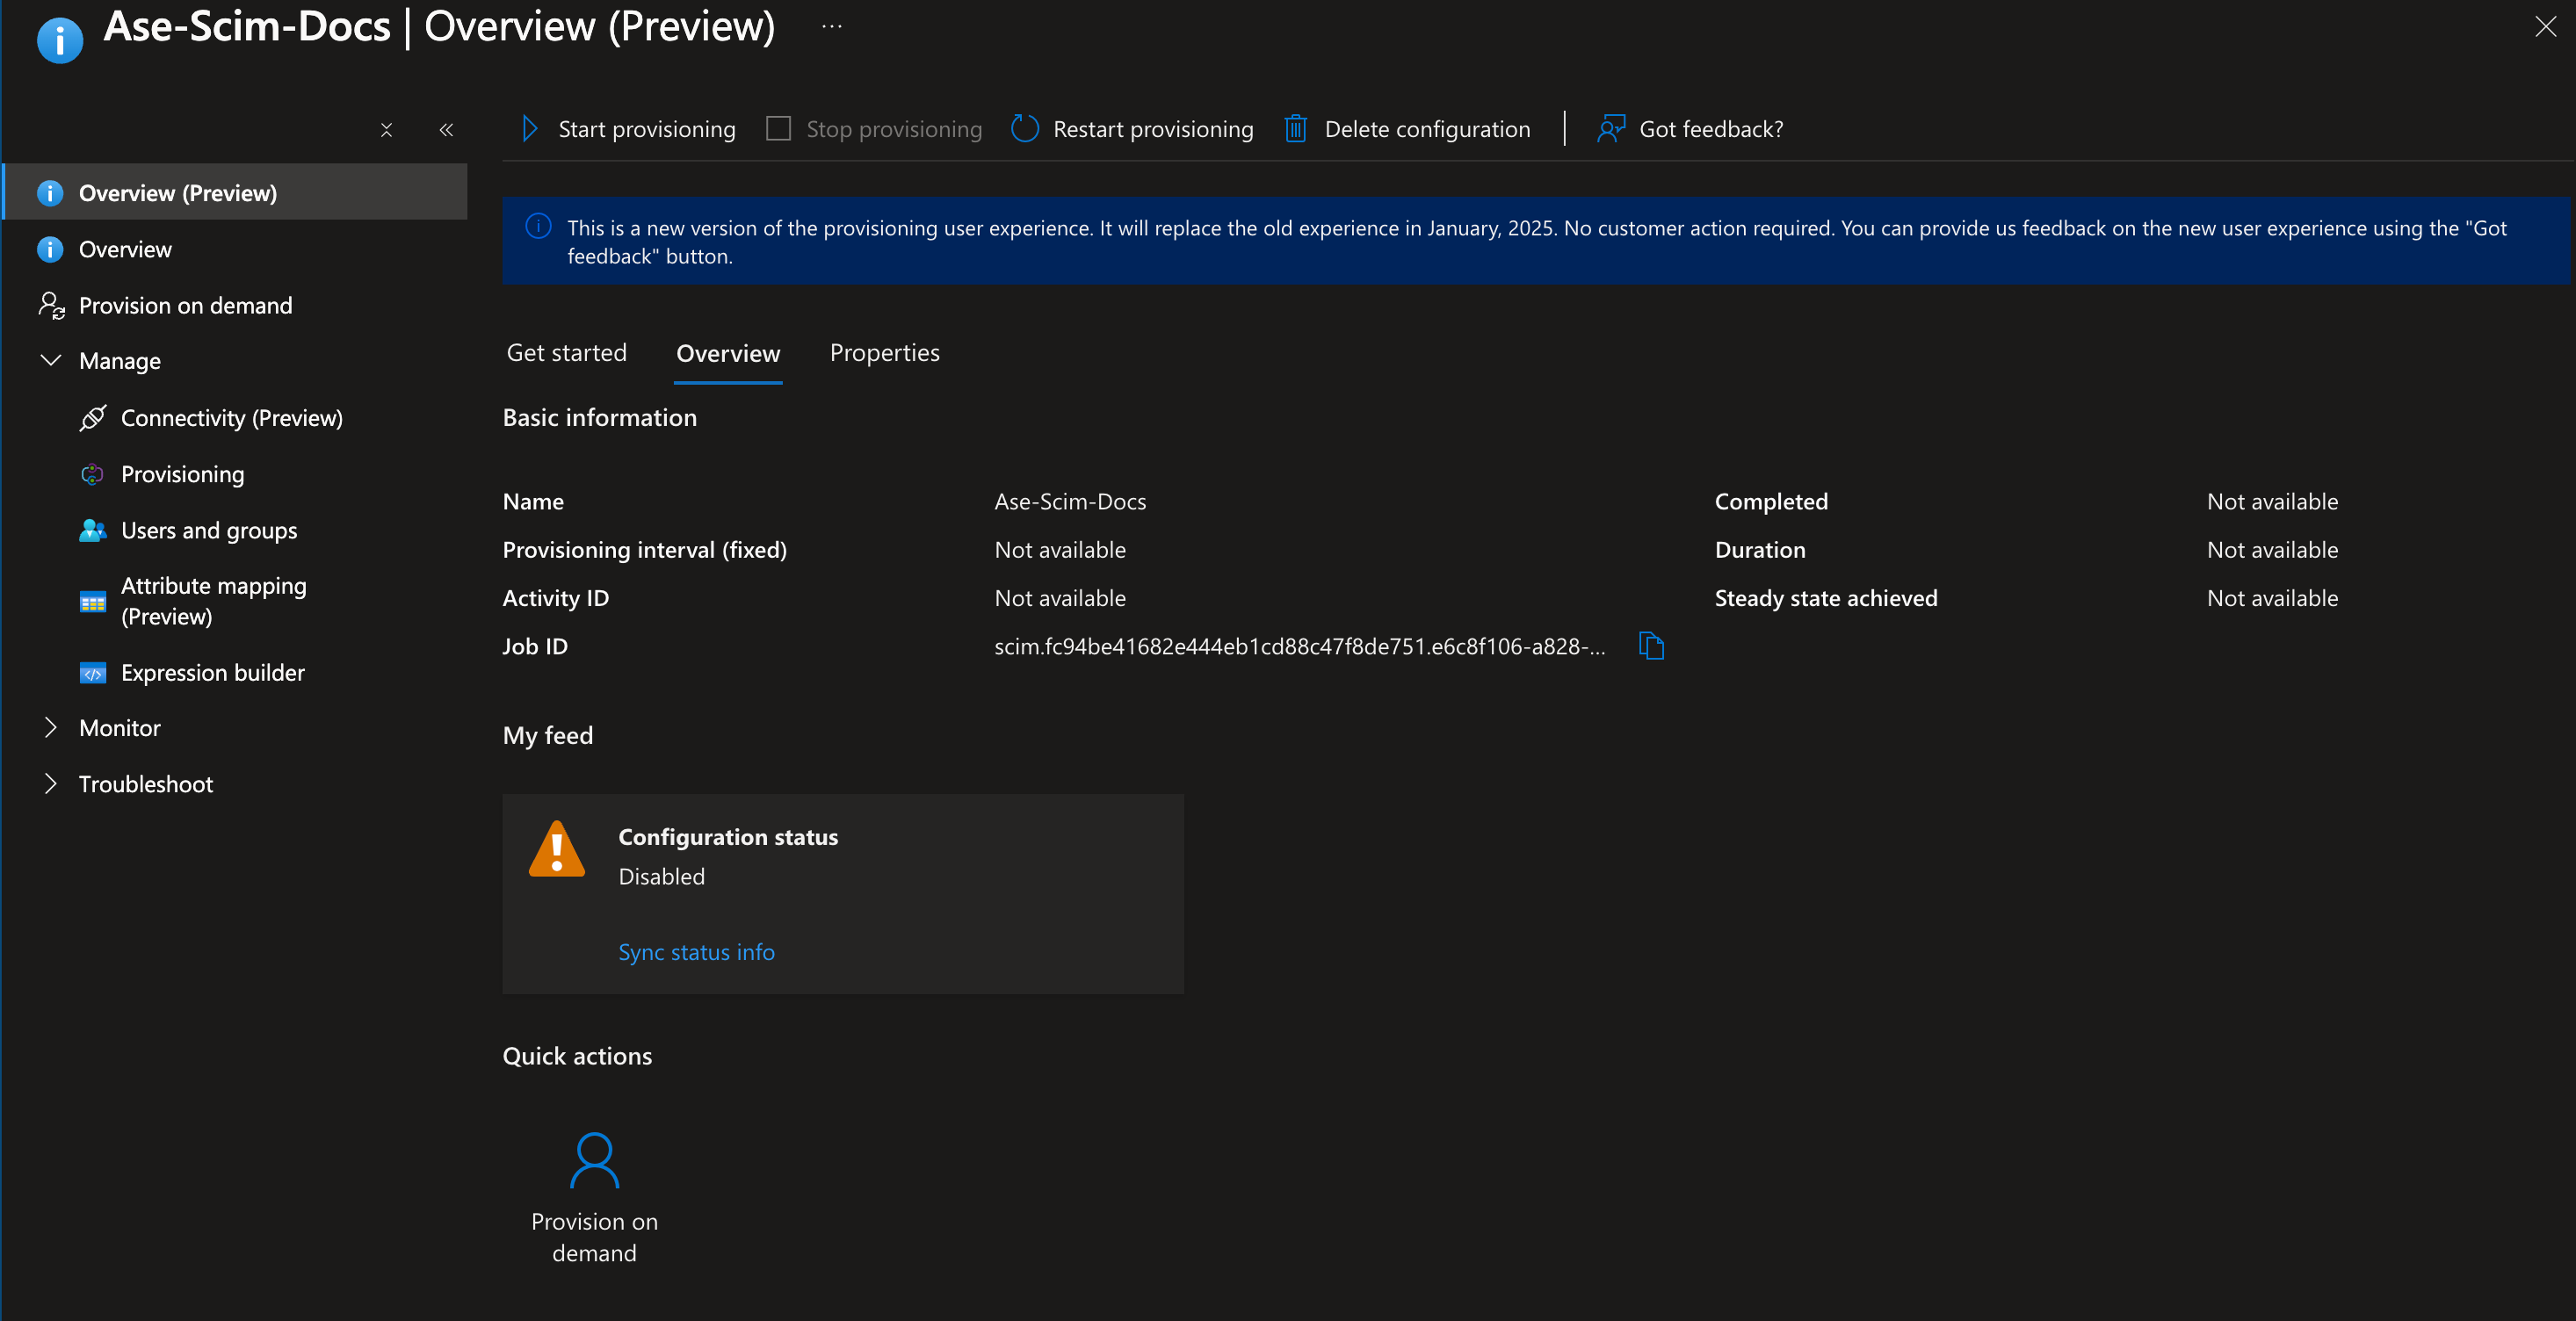 Interface displaying the status and settings for "Ase-Scim-Docs" provisioning configuration
10. Click on "
Provisioning" from the left menuSelect the provisioning mode: "Automatic".
Turn on the
Provisioning Status and press save. 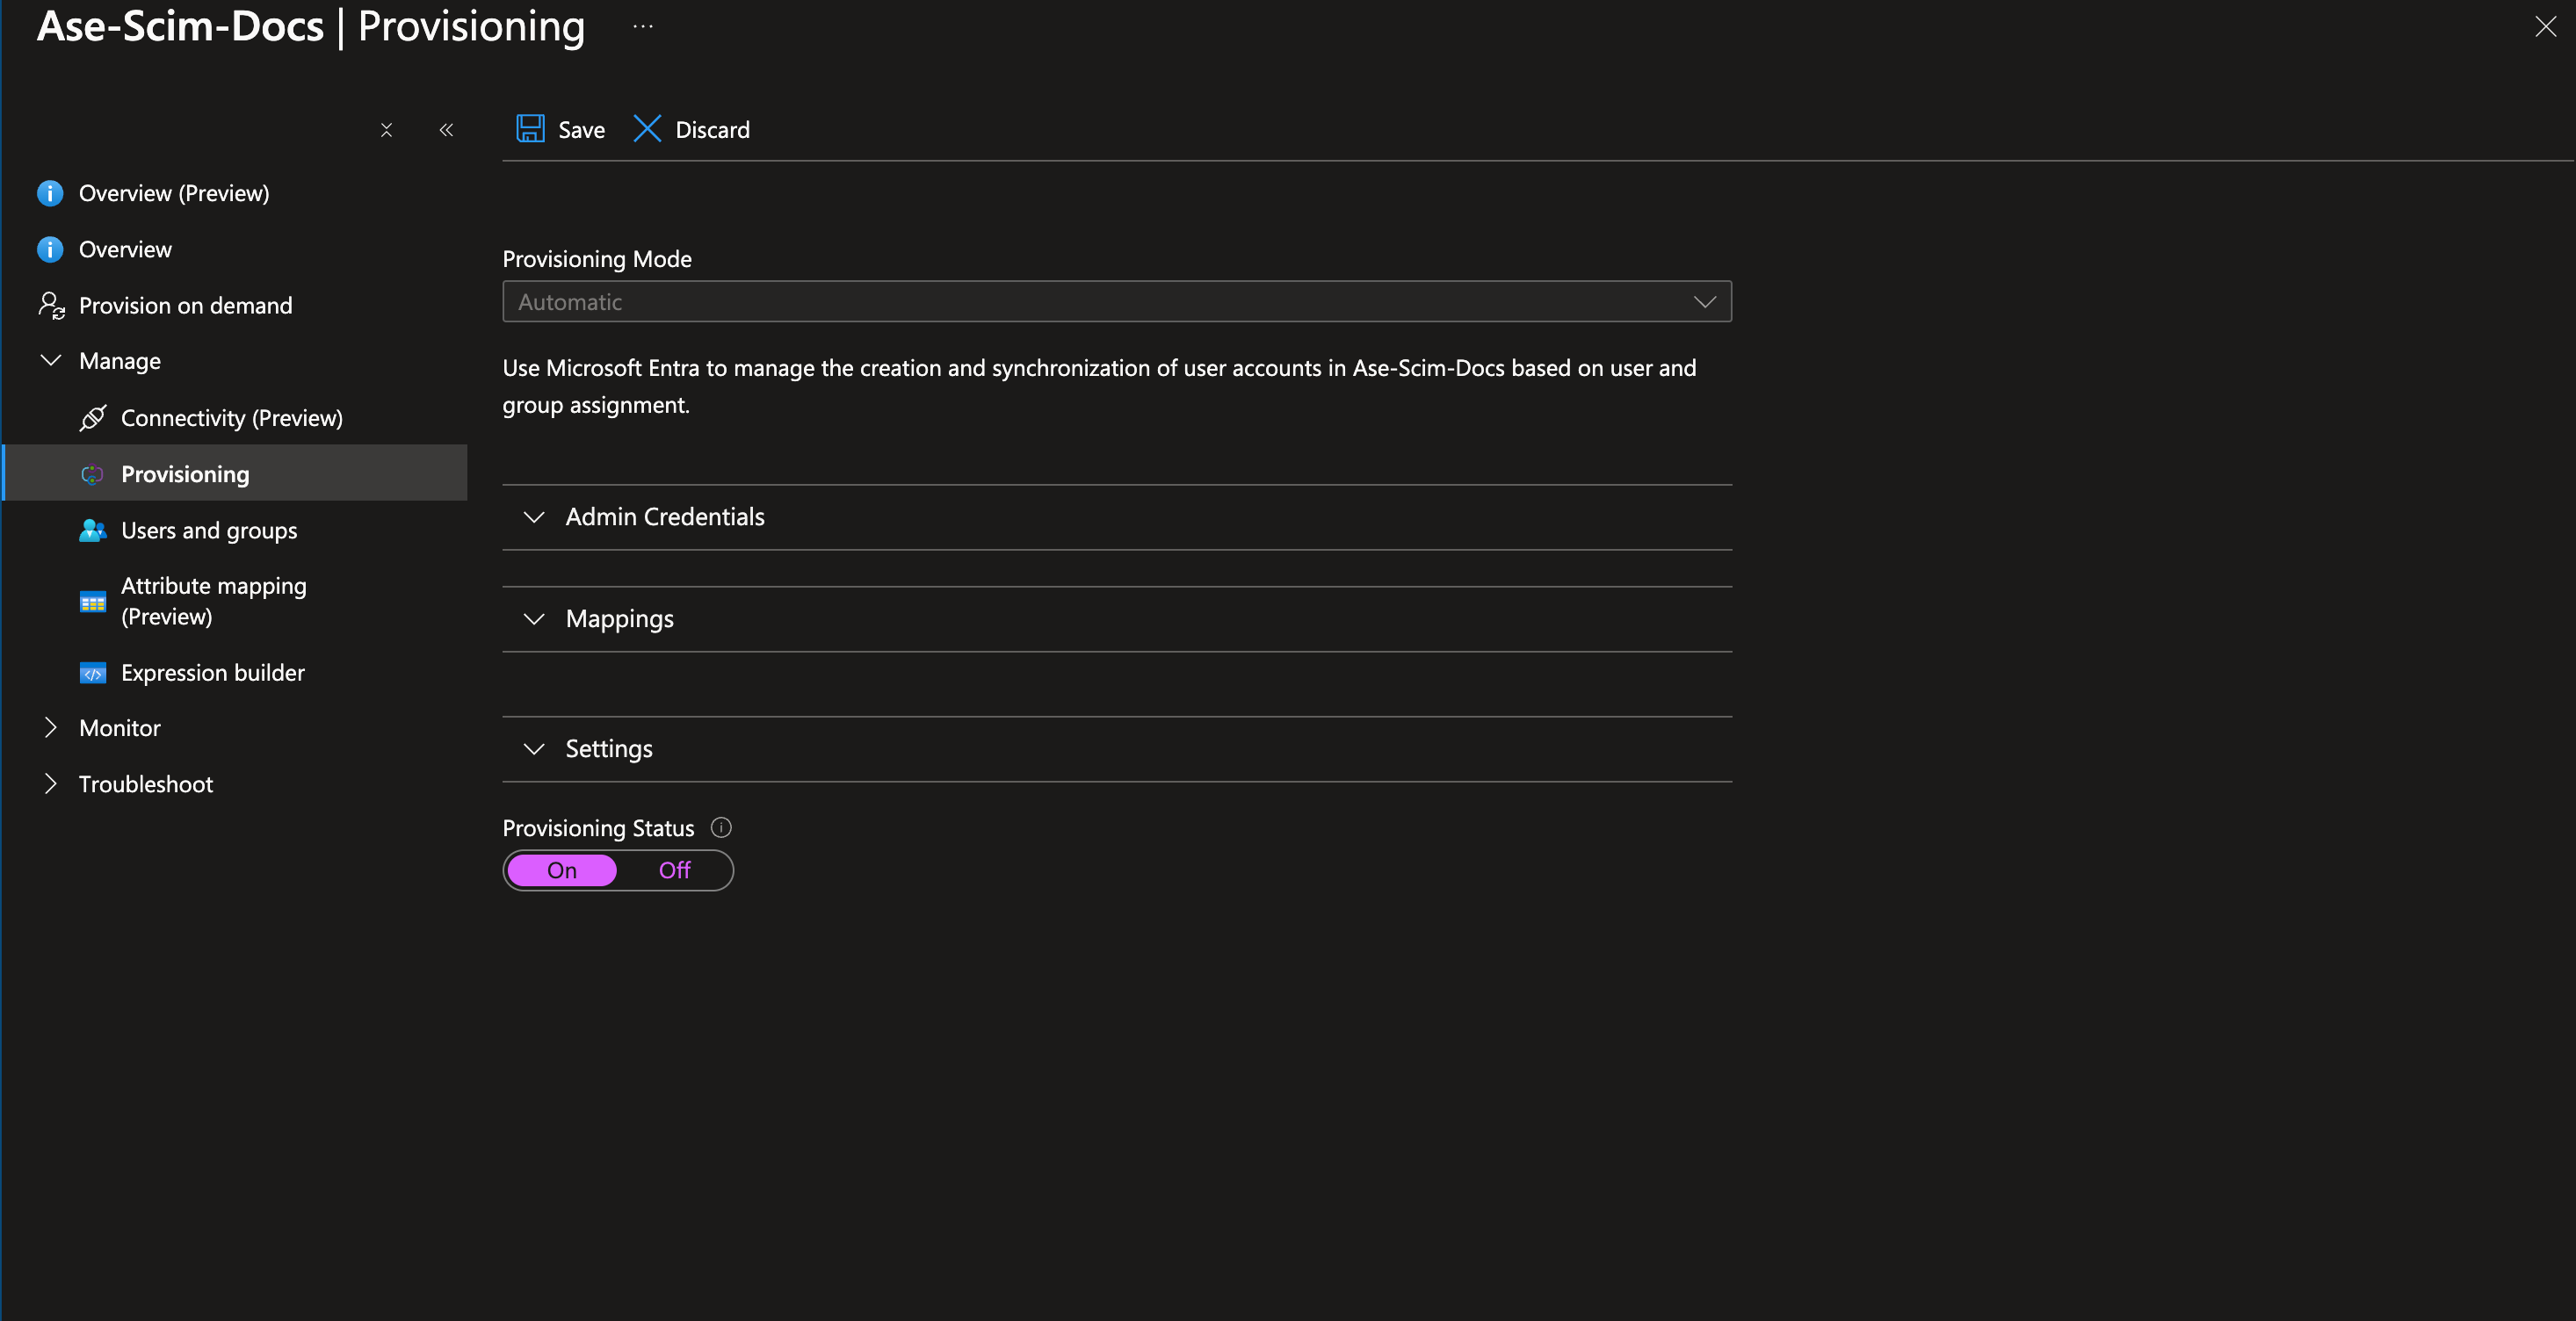 Interface for configuring provisioning settings in "Ase-Scim-Docs," including provisioning mode and admin credentials options.
The SCIM setup is complete!
Refer to Okta’s Expression Language documentation for more advanced mappings: Okta Expression Language Guide
Combine SCIM with SSO for seamless user authentication, as shown in our guide on Integrating SSO (Single Sign-On)
All the users and groups assigned to this application will sync with your AppSecEngineer dashboard.