Step 1: Connect JIRA to AppSecEngineer
Step 2: Configure JIRA Webhooks
-
Log in to AppSecEngineer
- Open your AppSecEngineer account and navigate to Integrations.
-
Initiate JIRA Connection
- Click on "JIRA Connect" to begin integration.
-
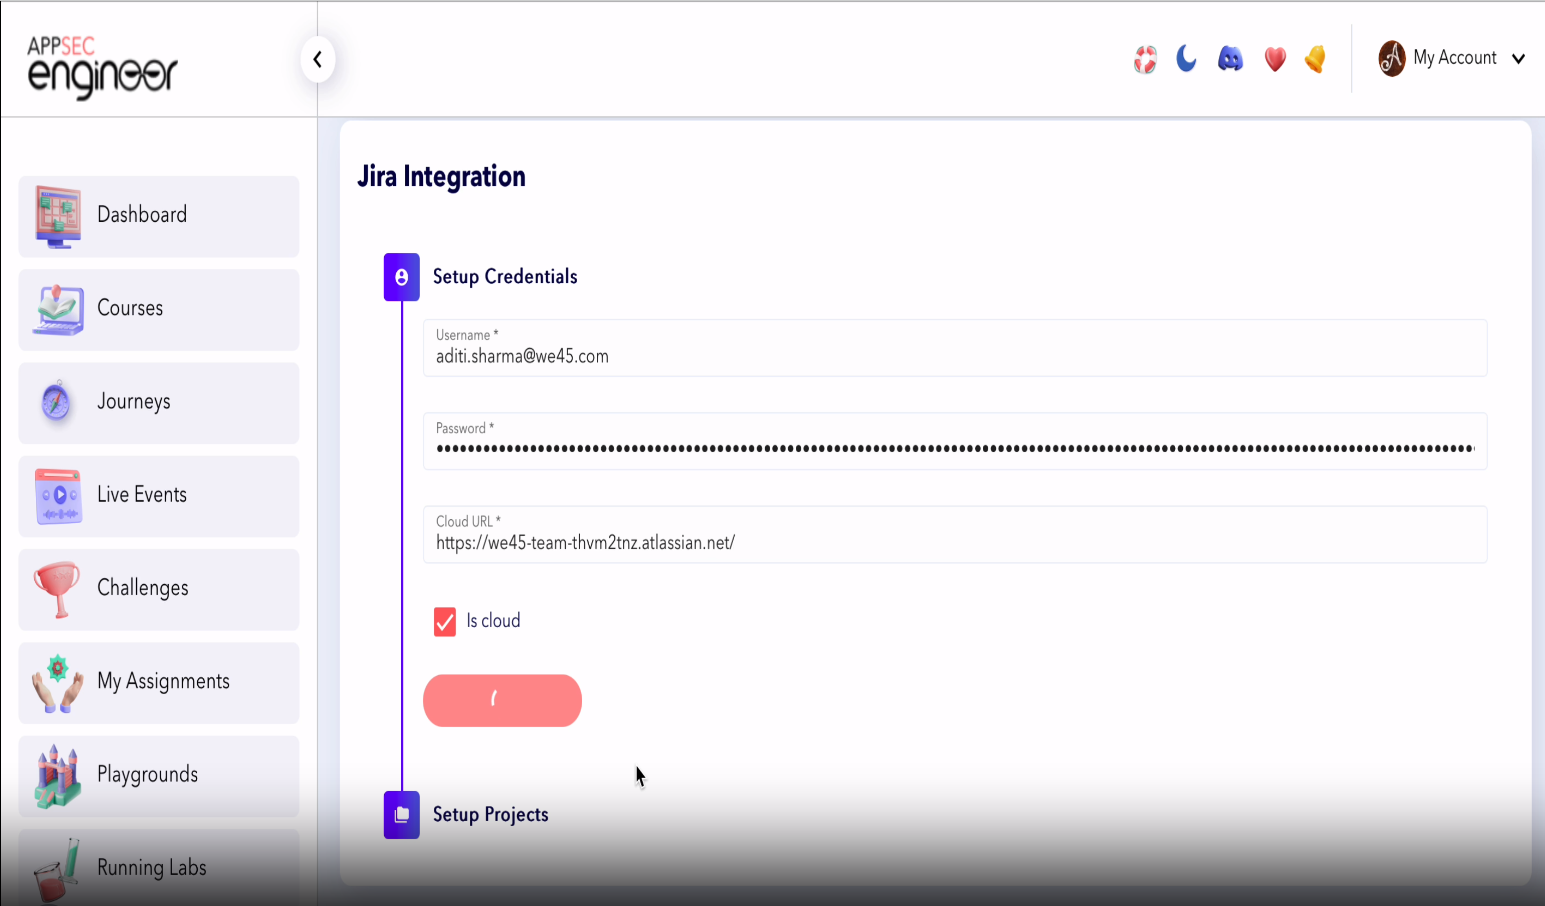
Enter Required Details
- JIRA Email: Use your registered JIRA email.
- API Token: Enter the JIRA API token (generated from your JIRA settings).
- Cloud URL: Copy and paste your JIRA Cloud URL into the provided file
-
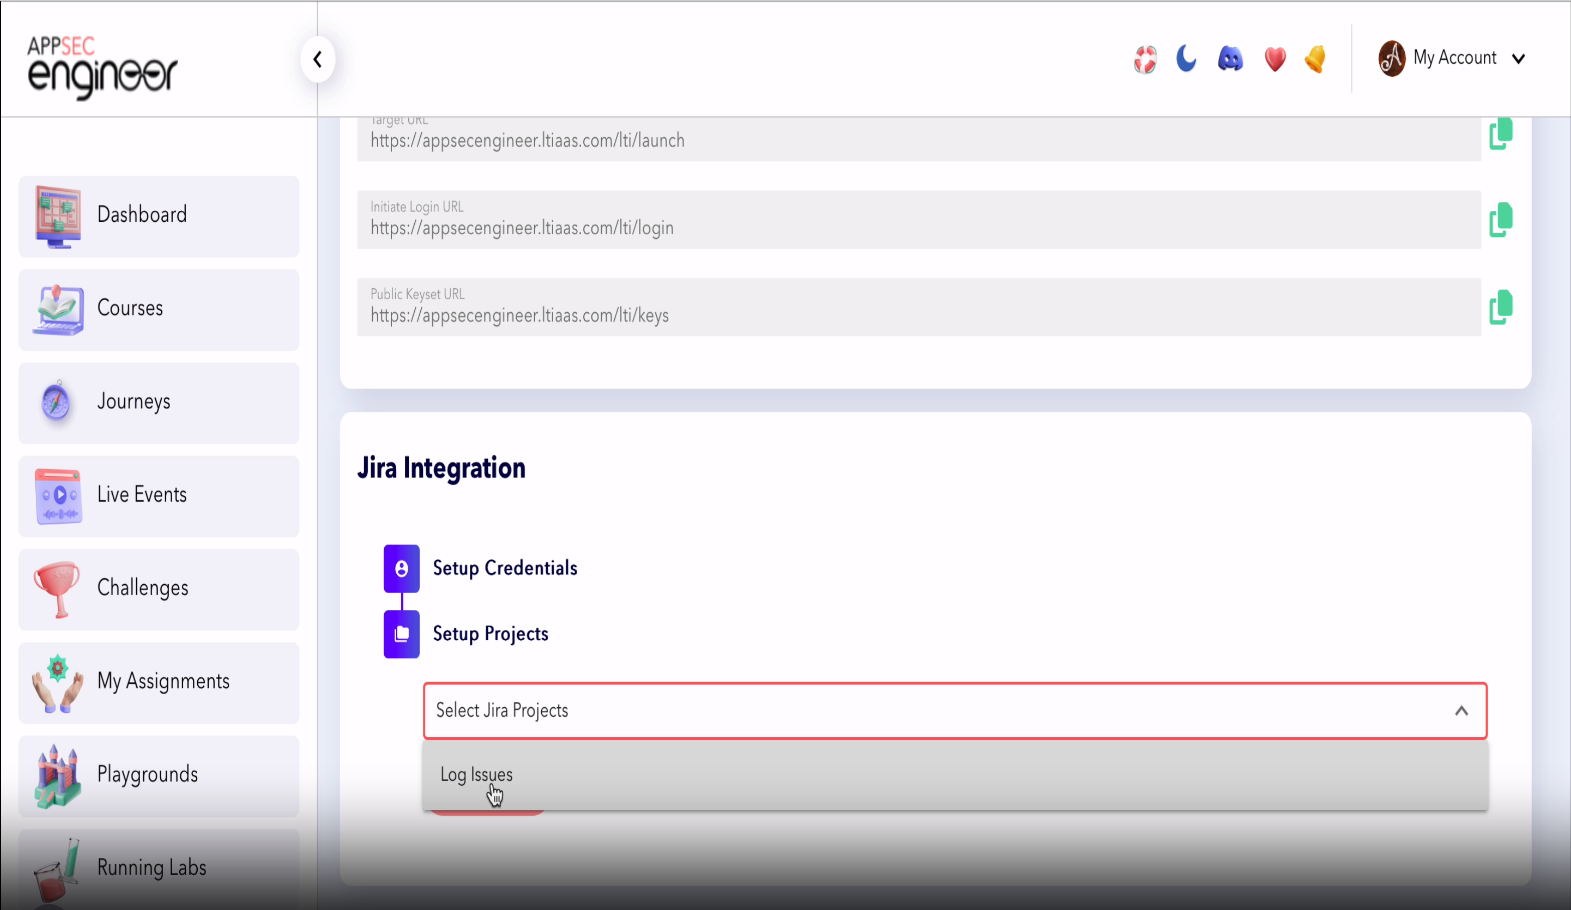
Select Your Project
- Choose the JIRA project you want to integrate.
-
Finalize Connection
- Click "Add Project" to establish the integration.
- Click "Add Project" to establish the integration.
Step 2: Configure JIRA Webhooks
-
Access JIRA Webhooks
- Go to JIRA Settings → System → Webhooks.
-
Create a New Webhook
- Click "Create Webhook" to add a new webhook.
-
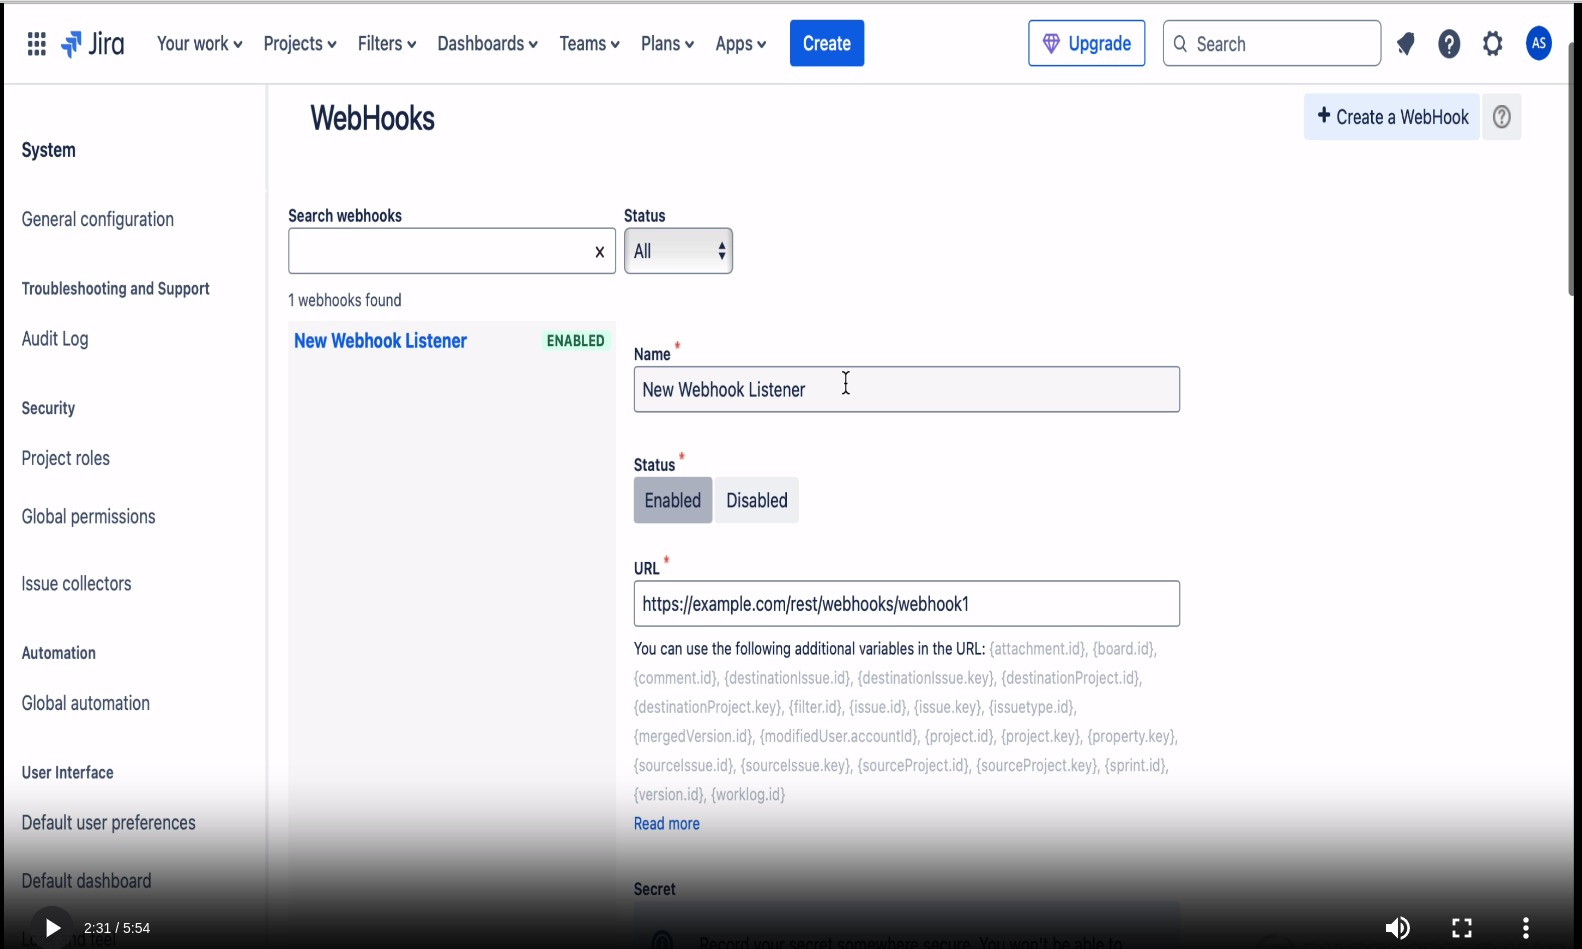
Configure Webhook Parameters
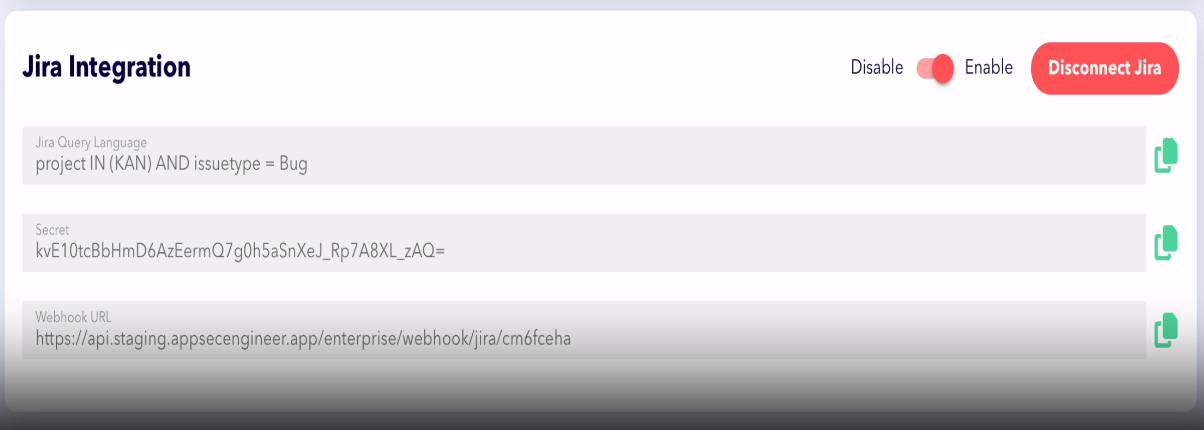
- Webhook Name: Enter a name like “Comment Automation Webhook”.
- Webhook URL: Copy the URL from AppSecEngineer and paste it in JIRA.
-
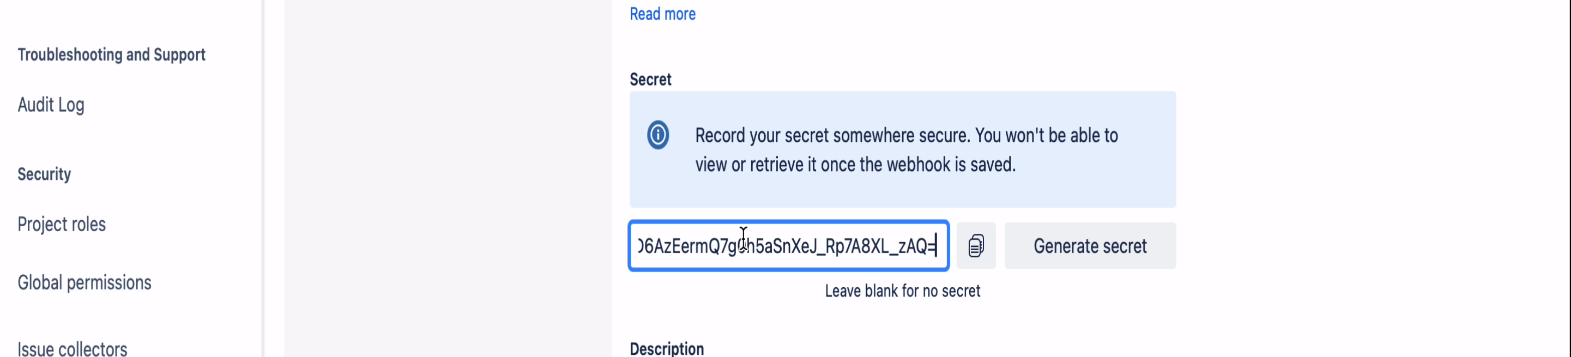
- Secret Key: Copy and paste the secret key from AppSecEngineer into JIRA.
Screenshot of Jira's Webhook settings displaying a generated secret key. A message advises users to record the secret securely, as it cannot be retrieved once the webhook is saved. The screen includes options to copy the secret or generate a new one.
- Secret Key: Copy and paste the secret key from AppSecEngineer into JIRA.
-
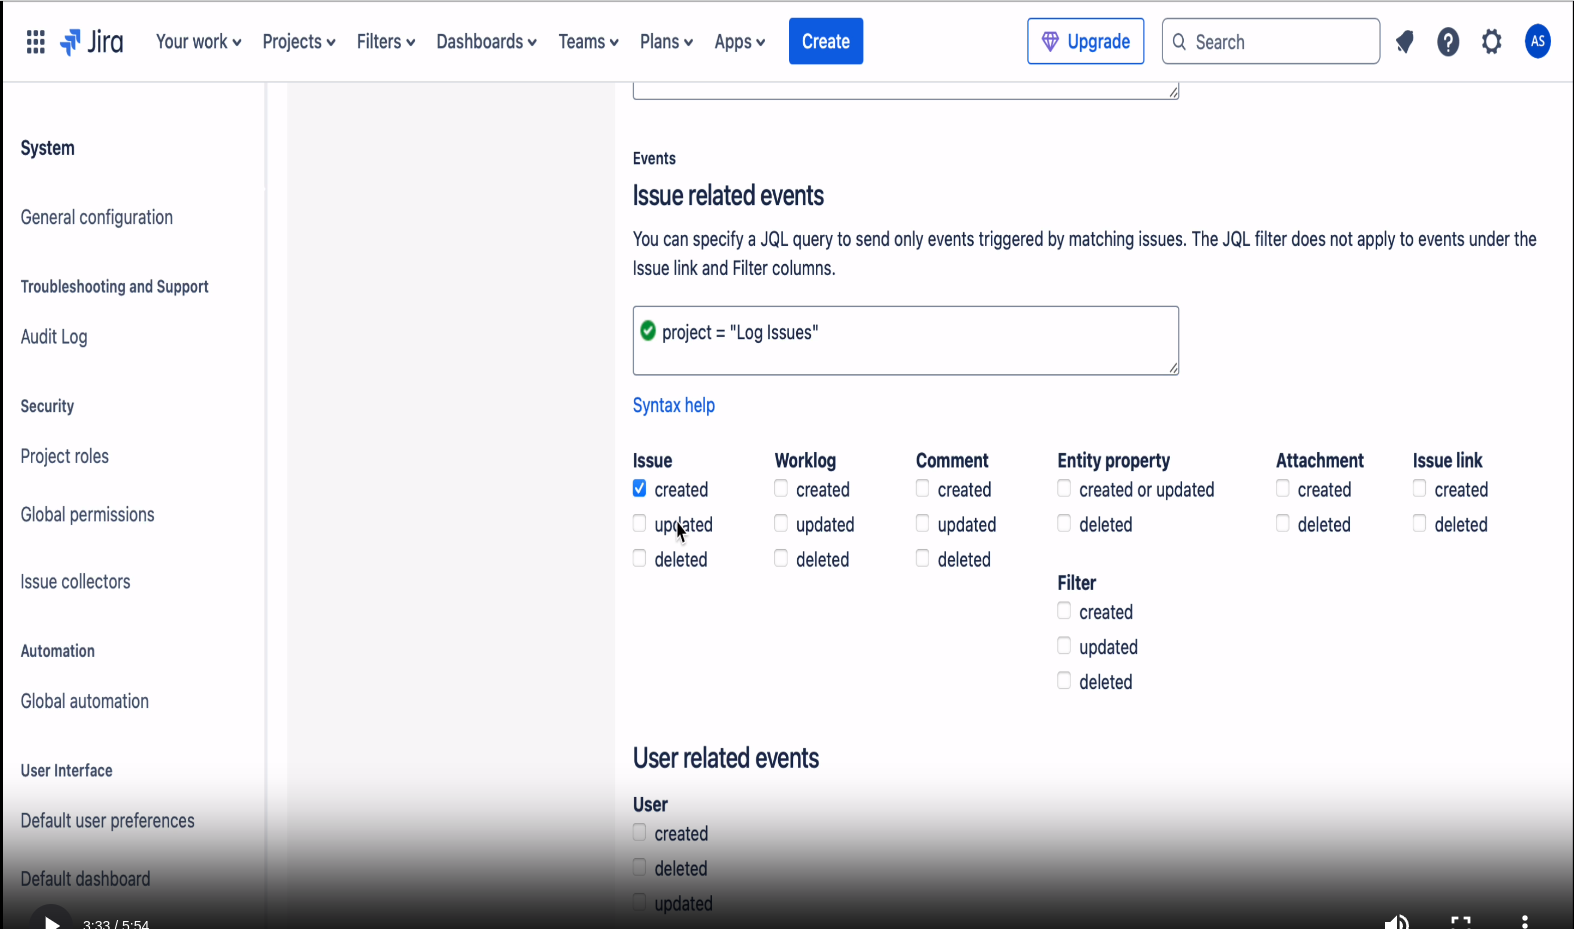
Set Event Triggers
- Select the Project Name as seen in AppSecEngineer.
- Enable relevant JIRA events to trigger automation.
The screenshot displays the Jira settings for configuring event triggers, with options to filter issue-related events based on creation, updates, and deletions
-
Save Webhook
- Click "Create" to save your webhook.
Step 3: Automate Comment Generation & Course Suggestions
-
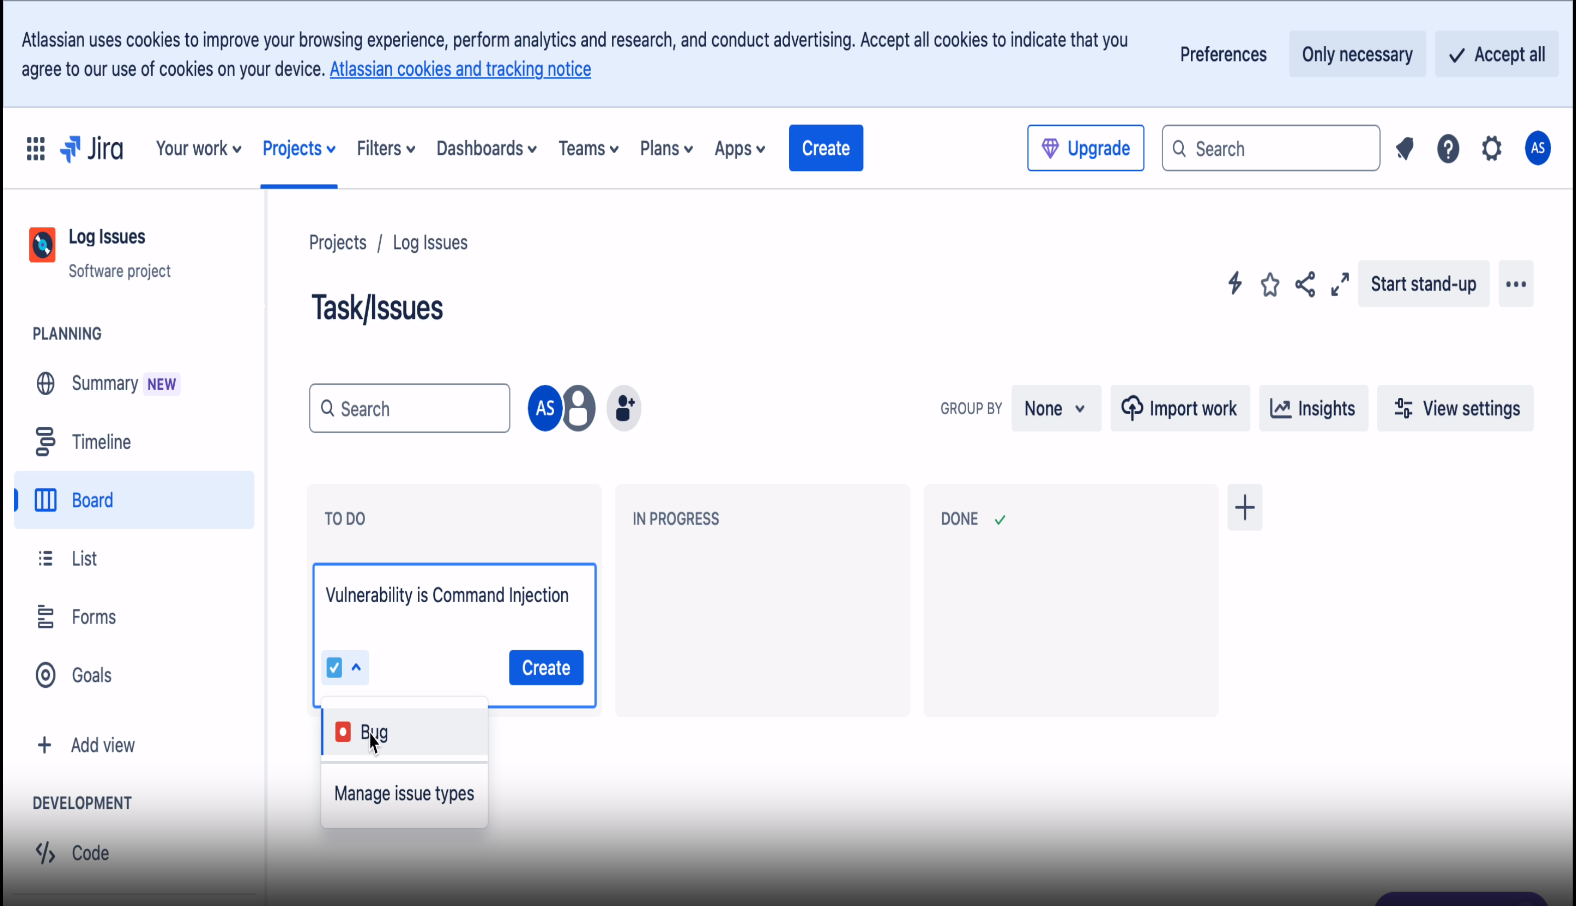
Choose the JIRA Project
- Select the JIRA project where automation should apply.
The screenshot shows a Jira dashboard for the "Log Issues" project, with task statuses and options to manage and view issues.
- Select the JIRA project where automation should apply.
-
Define the Task Type
- Set the task type to "Bug" or another relevant category.
-
Log Security Issue
- When a security issue is logged (e.g., Template Injection vulnerability), the system will:
✅ Automatically generate comments within the JIRA ticket.
✅ Provide course recommendations based on the issue context.
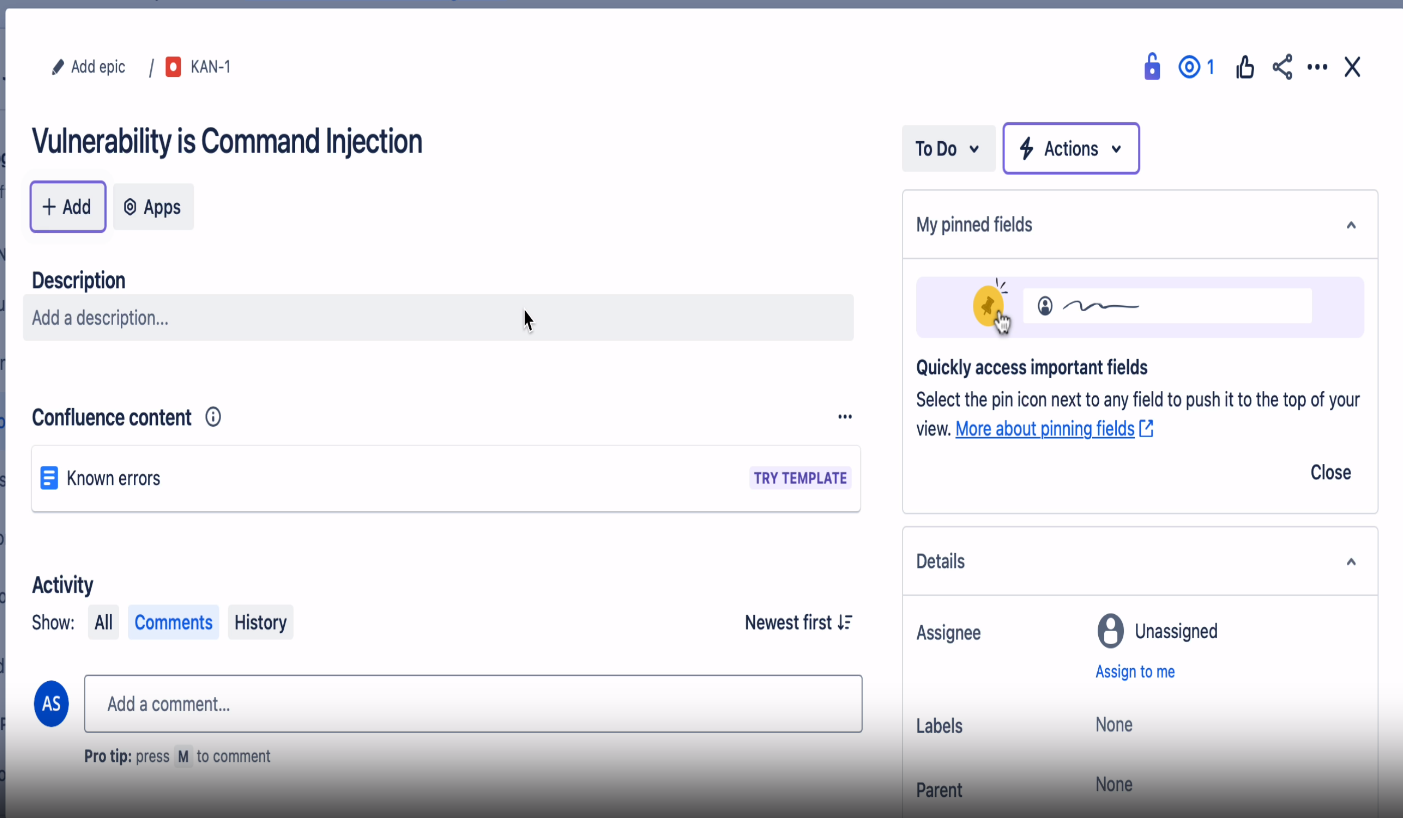
The screenshot shows the Jira issue detail view for a command injection vulnerability, with the option to add an epic (KAN-1). The task is currently unassigned, with fields to add descriptions, labels, and comments. Pinned fields and activity history are visible, and users can assign the task to themselves or add more details.
- When a security issue is logged (e.g., Template Injection vulnerability), the system will:
Benefits of JIRA Integration with AppSecEngineer- Automates repetitive tasks by generating security-related comments in JIRA.
- Enhances security training with real-time, contextual course recommendations.
- Improves DevSecOps workflows by aligning JIRA ticketing with security education.
For further assistance, contact help@appsecengineer.com.
-